I have been hearing and seeing many opinions expressed about the impact of AI on photography and art in general. It seems there is a fear that the days of photographers and even painters and other artists are numbered. Undoubtedly the way that we work and how we do things is evolving at such a rapid pace it is difficult to keep up. However, I believe there is something beyond the object created whether an image, a painting, or sculpture that cannot be replicated artificially.
I admit that part of my love of nature and wildlife photography comes down to the challenge of capturing a subject. Photography is an outlet for my competitive nature that developed through years of playing sports. But it is more than the challenge. Photographs share an experience, an emotion from a moment in time. When I am sharing an image, I am sharing the awe, the wonder, the excitement of the moment with you. Think about some of the famous photographers such as Ansel Adams. His photographs are more than images printed on a piece of paper. They evoke a shared experience of the landscapes he explored.
Awe, wonder, joy, love, or despair is inexplicably infused into an artist’s work making it more than an image or an object to observe. It has an essence that when listened to speaks to the observer. One connects with the shared experience through the work of the artist. This cannot be replicated artificially. “Things” can be created artificially, but beautiful experiences cannot be. So here is to all the artist sharing their hearts and experiences with us evoking a sense of awe, wonder, joy, love, despair… What you share with the universe cannot be artificially replicated.
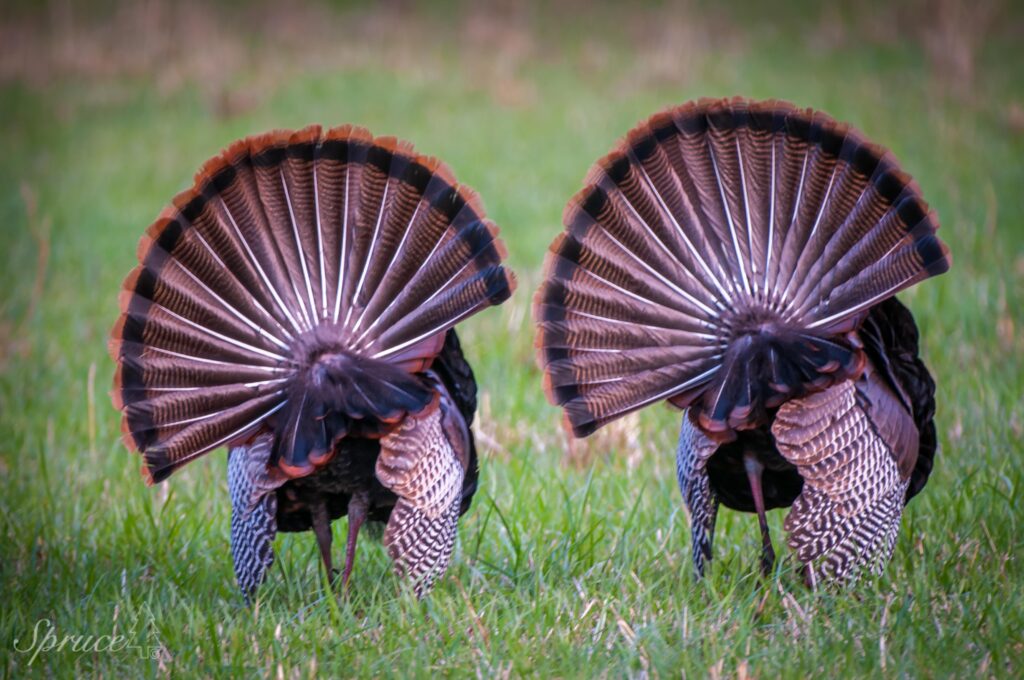
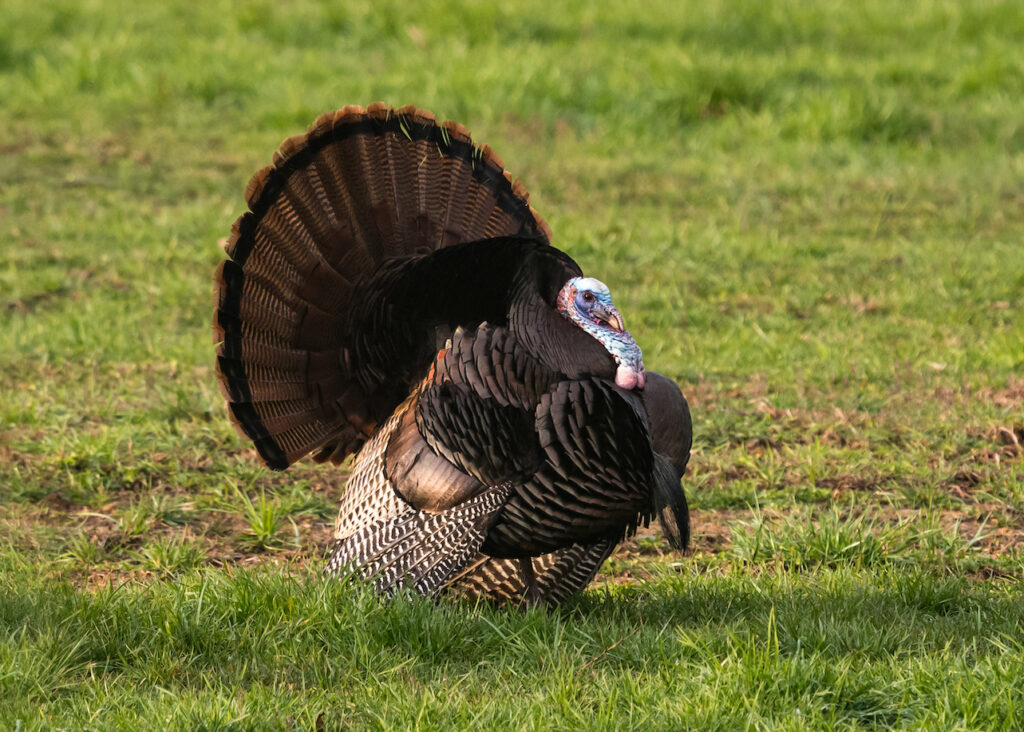
Whether you are a photographer or birder knowing the habits of your target will greatly enhance your chance of seeing and photographing it. American Wild Turkey is a fascinating subject to photograph and observe. What might appear to be a very dull brown bird in one light, can be a beautiful iridescent bronze in another. Additionally, even among the rather plain hens you may encounter a genetic variation called a “smoke phase” or white hen. So, join us in an exploration of the American Wild Turkey.
Curious Name
The American Wild Turkey (Meleagris gallopavo) is one of North America’s most iconic native birds. Despite the name, Wild Turkey have no direct connection with the country of Turkey. Apparently when European settlers first encountered these birds in the Americas, they mistakenly believed they were related to guinea fowl. Guinea fowl were imported to Europe through Turkish merchants. This association led to the name “Turkey bird”, which eventually shortened to simply “turkey”. Turkey parlance includes the additional designations of Tom for a mature male, Jake for a younger male, Hen for a female, and Poult for a young turkey. With naming conventions out of the way, let’s jump into where Turkeys live, their reproductive cycle, and behaviors.
Geographic Range and Habitat
Wild Turkeys are native exclusively to North America with an extensive habitat range. They are found throughout most of the continental United States, parts of southern Canada, and portions of northern Mexico. Turkeys require diverse habitats that provide mature trees for roosting, open understory areas for breeding displays, grassy or shrubby areas for nesting, and food sources such as nuts, seeds, berries, insects, and small vertebrates. In the Great Smoky Mountains, Wild Turkeys favor mixed hardwood forests with oak and hickory trees, interspersed with open areas for foraging and breeding activities.
Nesting and Reproduction
Hens typically begin nesting in late April to early May, selecting a shallow depression on the ground, often at the base of a tree or under brush for concealment. The nest is typically lined with dead leaves and small twigs.
The average clutch size for Eastern Wild Turkeys ranges from 10 – 15 eggs. The eggs are pale buff in color with reddish-brown spots and are 1.9 – 2.7 inches long and 1.6 – 1.9 inches wide. Hens are solely responsible for incubation, which lasts approximately 26-28 days. During this period, the hen will only leave the nest briefly to feed, keeping the eggs warm and protected. Once hatched, the poults are able to leave the nest within 24 hours, though they remain highly vulnerable. The hen will guide her brood to feeding areas, teaching them to forage while remaining vigilant for predators.
Roosting Behavior
Wild turkeys are diurnal birds that roost in trees at night for protection from predators. They typically select mature trees with horizontal branches that can support their weight. Interestingly, turkeys follow a consistent pattern when roosting. As dusk approaches, they begin moving toward their roosting sites, often gathering in small groups. They’ll fly up into the trees just before darkness falls, and in the morning, they typically fly down shortly after dawn to begin their daily foraging.
Predators and Survival Strategies
Wild turkeys face numerous predators throughout their lifecycle. Eggs and poults are particularly vulnerable to raccoons, skunks, foxes, coyotes, bobcats, and various raptors. Adult turkeys are primarily threatened by bobcats, coyotes, and great horned owls. To avoid predation, turkeys rely on their exceptional eyesight and hearing. They can detect movement at great distances and possess color vision. When threatened, turkeys will typically run rather than fly and are capable of reaching speeds up to 25 mph. However, they can fly short distances at speeds of 35-55 mph when necessary to escape danger.
The Eastern Wild Turkey
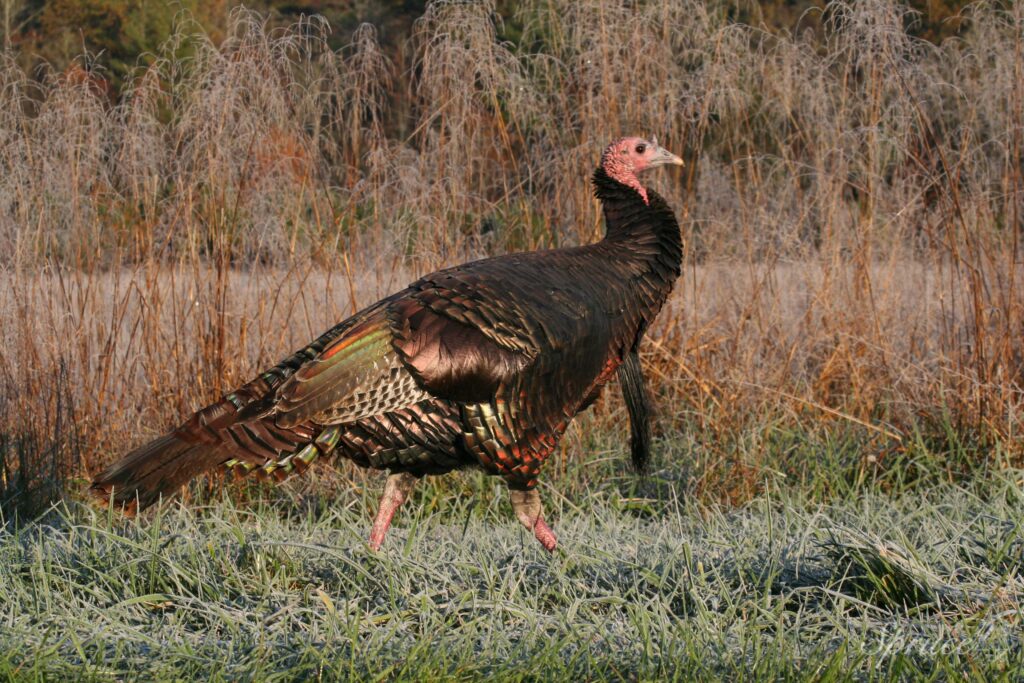
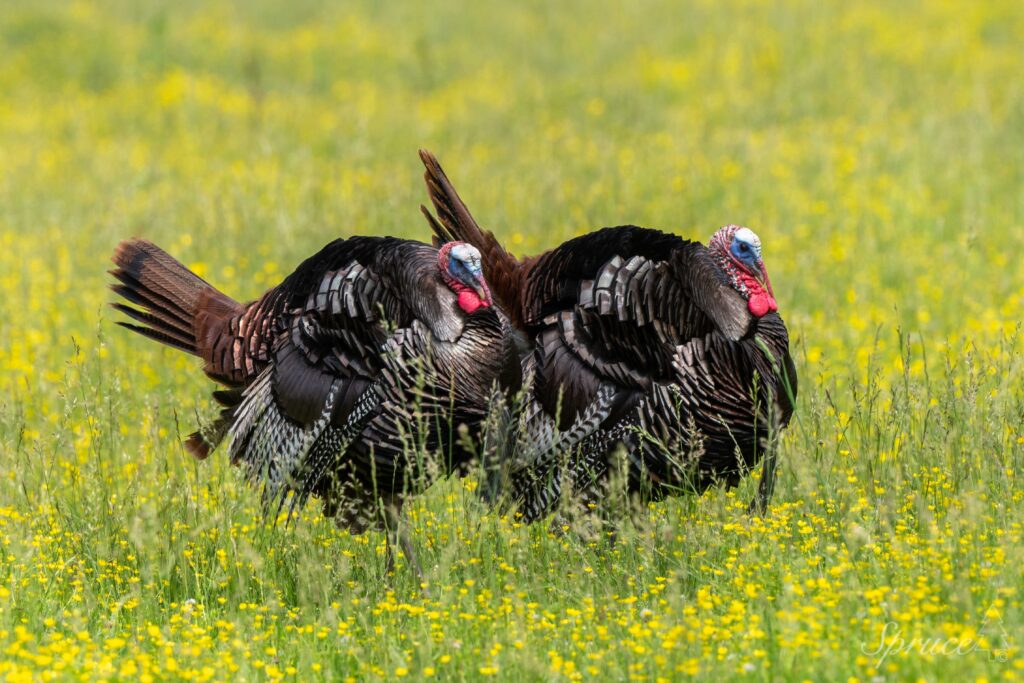
The Eastern Wild Turkey (M. g. silvestris) is the subspecies that you will encounter throughout the eastern half of the United States including the Great Smoky Mountains. They have a rich, bronze-colored plumage with copper and green iridescent highlights. Toms typically weigh between 18-24 pounds, while hens are smaller, weighing 8-12 pounds.
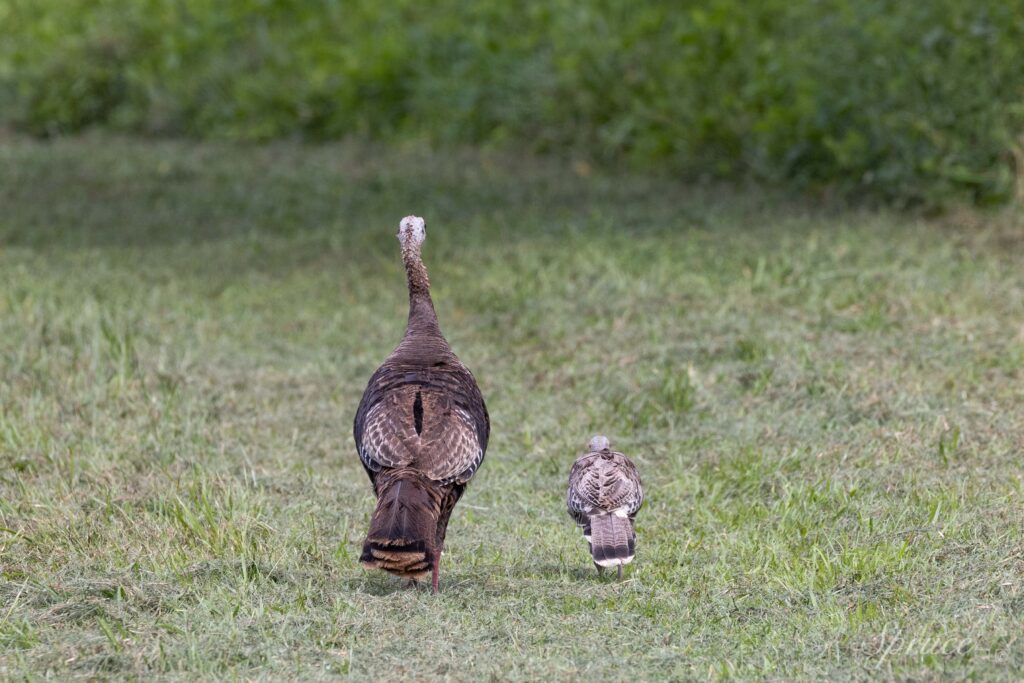
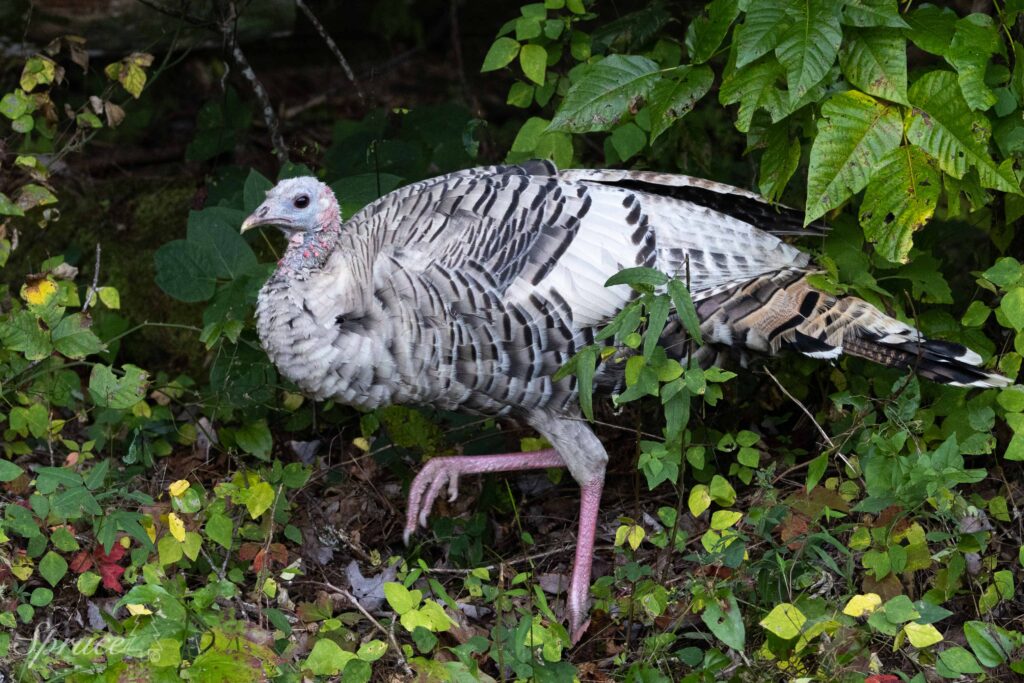
Interestingly, there is a significant population of white hens in the Smokies. These “smoke phase” Wild Turkeys are not true albinos, but exhibit a genetic condition called leucism, which causes partial loss of pigmentation. Unlike albinos, which have pink eyes, leucistic turkeys typically maintain their normal eye color. The genetic trait appears to be more common in the isolated turkey populations of the Smoky Mountains than in other regions.
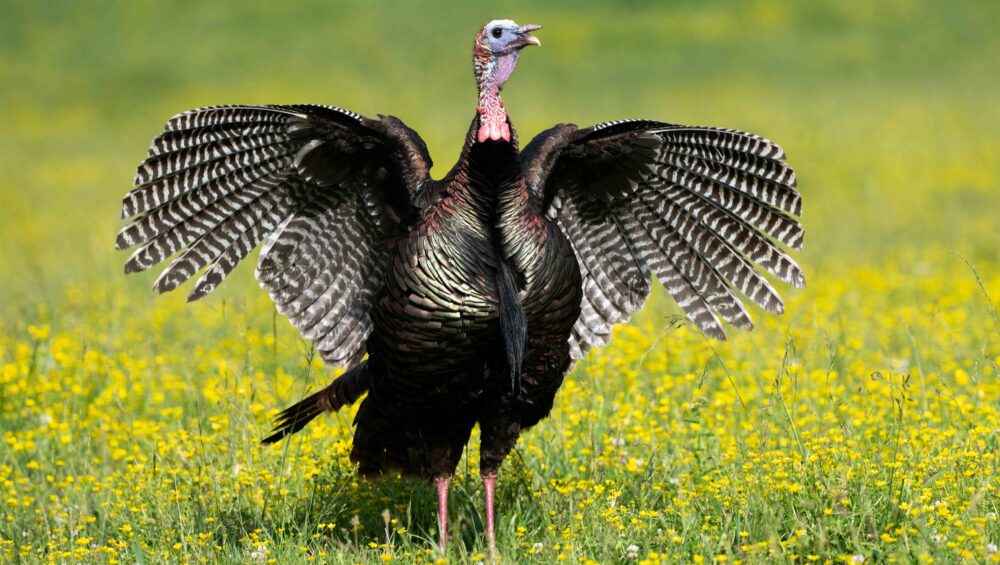
Photographing Wild Turkeys in the Smoky Mountains
For photographers wanting to capture images of Wild Turkeys strutting and displaying, the fields of Cades Cove are ideal. In the Spring males are in full breeding plumage. Focus on composing photographs that tell a story by showing the mountains in the background. Look for fields with colorful flowers to enhance the image of the bird. Early morning and late afternoon will provide the best lighting and more activity. Lighting is important to capture the iridescent plumage. Aim to be in place and ready to photograph just after dawn.
Don’t forget to take time to photograph the hens and look for the white hens. The best time to photograph hens with poults is typically late spring and early summer. The young poults will be following the hen as she leads them to various spots to feed.
Look Who Came for Dinner
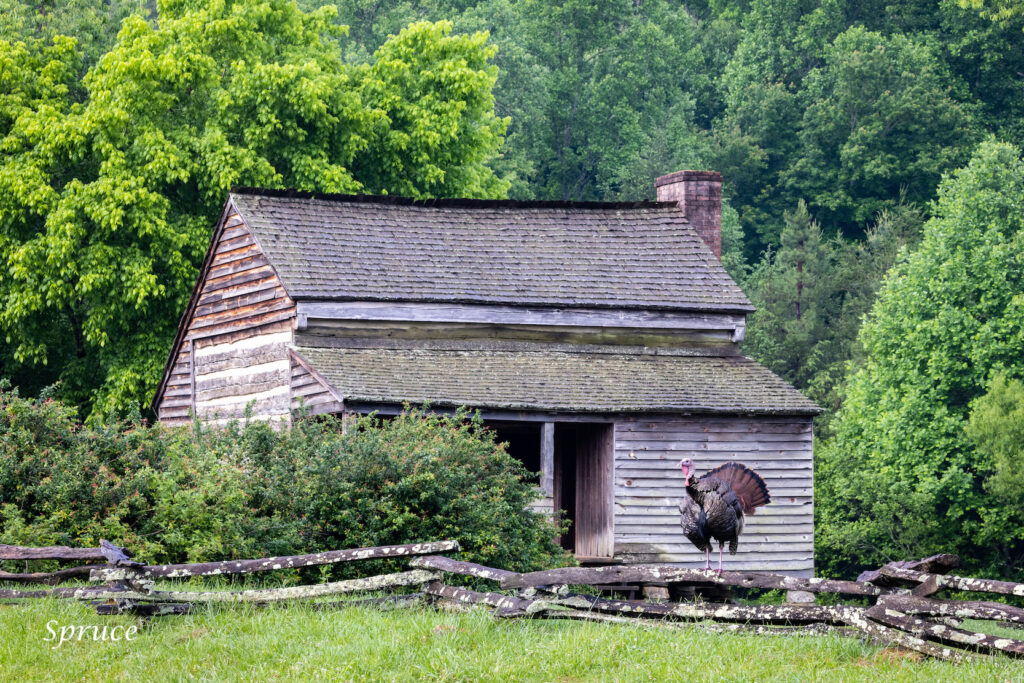
Looking for that Perfect Cades Cove Turkey Image?
What better way to celebrate Cades Cove and its iconic cabins and wildlife than the above photograph of Dan Lawson cabin with a Tom Turkey posing in front? May’s featured image titled, “Look Who Came for Dinner”, perfectly captures an unforgettable moment in the Smoky Mountains. Receive 10% off with code “TalkingTurkey”.
Discount good through May 31.
References:
National Wild Turkey Federation. (2024). “Eastern Wild Turkey.” Retrieved from https://www.nwtf.org/conservation/species/eastern
Cornell Lab of Ornithology. (2024). “Wild Turkey.” All About Birds. Retrieved from https://www.allaboutbirds.org/guide/Wild_Turkey/
National Park Service. (2023). “Wild Turkeys of the Great Smoky Mountains.” Retrieved from https://www.nps.gov/grsm/learn/nature/wild-turkey.htm
Dickson, J.G. (1992). The Wild Turkey: Biology and Management. Stackpole Books.
McRoberts, J.T., Wallace, M.C., & Eaton, S.W. (2014). “Wild Turkey (Meleagris gallopavo).” The Birds of North America. Cornell Lab of Ornithology.
Audubon Society. (2024). “Wild Turkey.” Guide to North American Birds. Retrieved from https://www.audubon.org/field-guide/bird/wild-turkey
Tennessee Wildlife Resources Agency. (2023). “Wild Turkey in Tennessee.” Retrieved from https://www.tn.gov/twra/wildlife/birds/wild-turkey.html
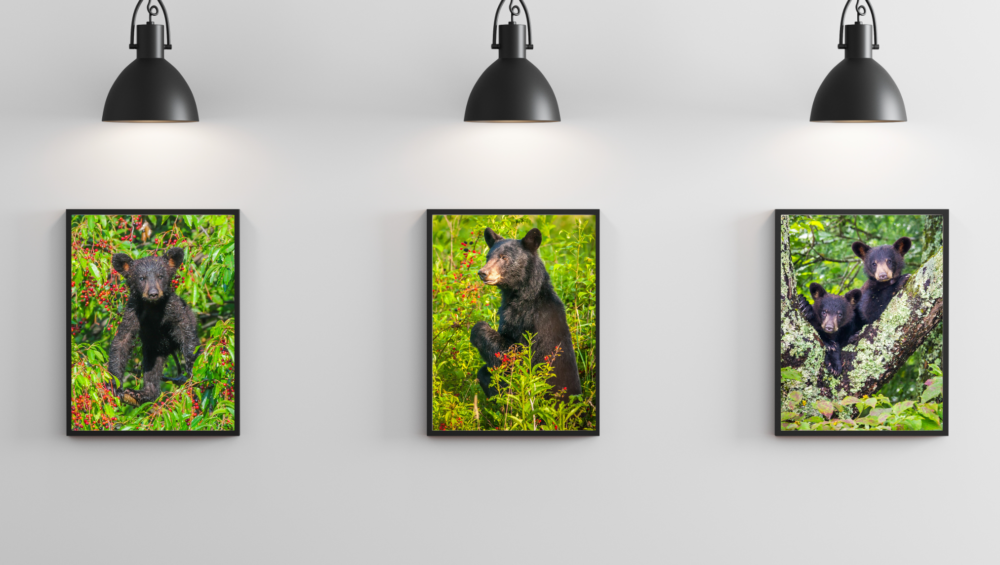
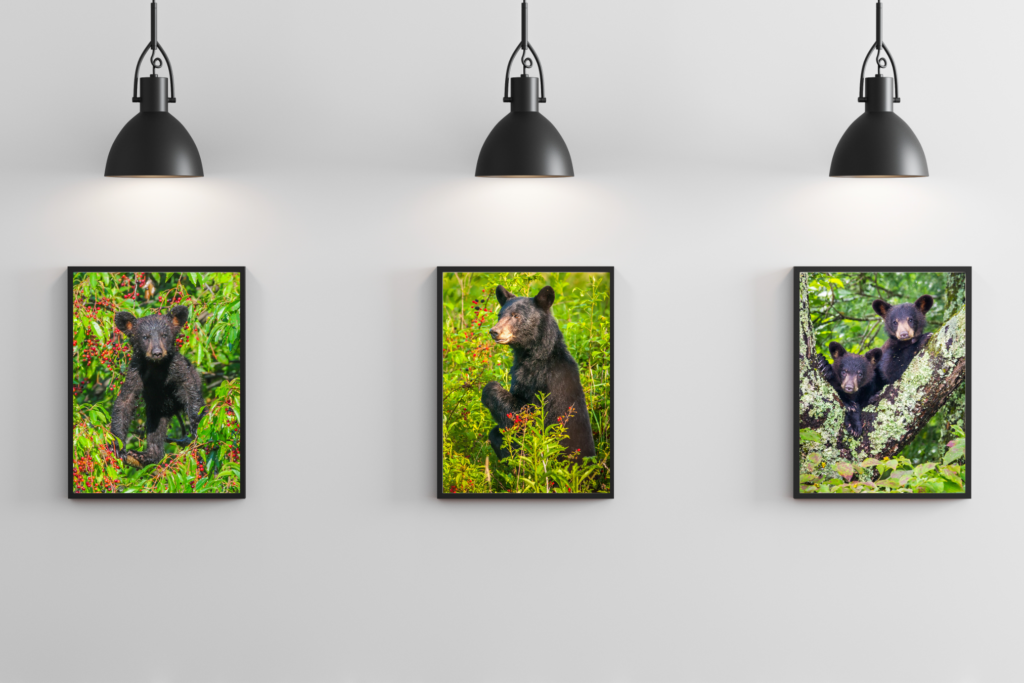
For nature lovers and photography enthusiasts, decorating your home with stunning landscape prints of the Smoky Mountains is a natural choice. The rolling peaks, misty valleys, and vibrant sunrises captured in these images bring a sense of peace and timeless beauty to any space. But what about those smaller corners, accent walls, or cozy nooks that need a little extra charm? Or that landscape centerpiece that needs complementary pictures? That’s where wildlife prints come in—perfect companions to your landscapes. Think of an adorable black bear cub in a tree, your favorite owl perched on a branch, or a graceful deer in a meadow—these smaller-scale prints can tie your love for the Smokies into every room of your home.
Why Wildlife Prints Work with Landscape Photography
Wildlife prints are more than just decorative fillers; they tell a story. Pairing a Smoky Mountain vista with a close-up of a mammal or a favorite bird creates a cohesive narrative. The landscapes set the scene, while the wildlife brings it to life, reflecting the vibrant ecosystem. For those who find joy in the sights of birds, bears, deer, and other wildlife, these prints offer a way to showcase your favorite creatures in a sophisticated style.
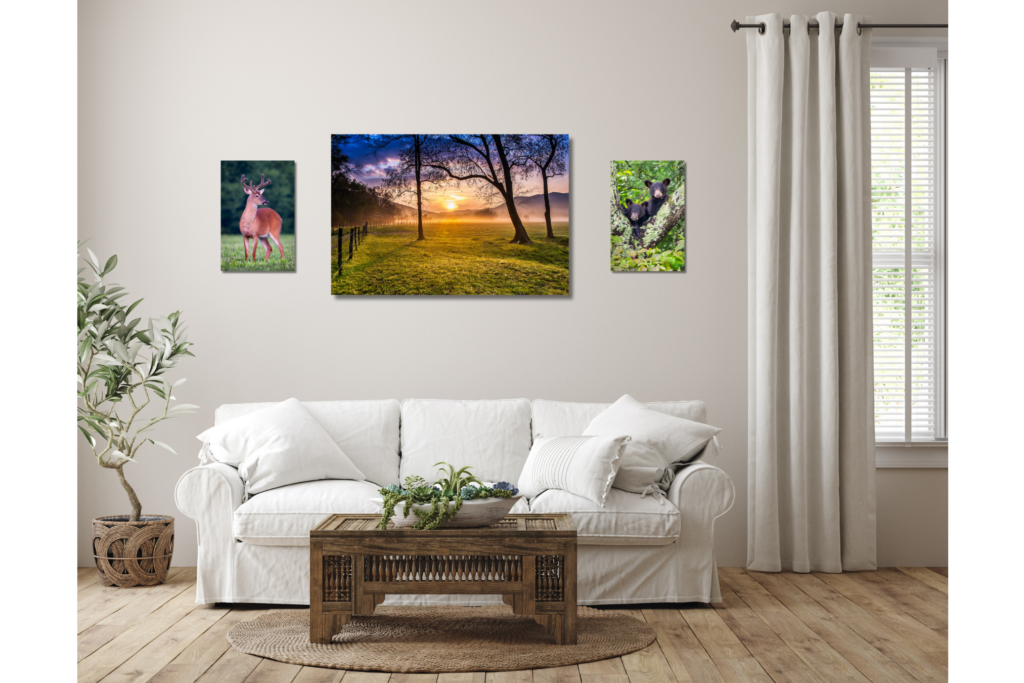
Smaller wildlife prints are ideal for filling spaces where a large landscape might overwhelm—like above a side table, in a hallway, or as part of a gallery wall. Their scale allows for flexibility, letting you mix and match species and scenes to suit your taste. Imagine a metal print of a foggy Cades Cove morning as the centerpiece over your living room couch, flanked by smaller metal prints of bear cubs and a whitetail deer. The result? A balanced, nature-inspired look.
The Magic of Metal Prints: Float Mounts and Beyond
When it comes to displaying your wildlife and landscape photography, metal prints offer a modern, sleek solution. At our online store, we specialize in two standout options: metal prints with float mounts and standalone metal prints. Both bring unique advantages to your decor, especially for those seeking a polished, ready-to-display look without the fuss of traditional framing.
Metal Prints with Float Mounts
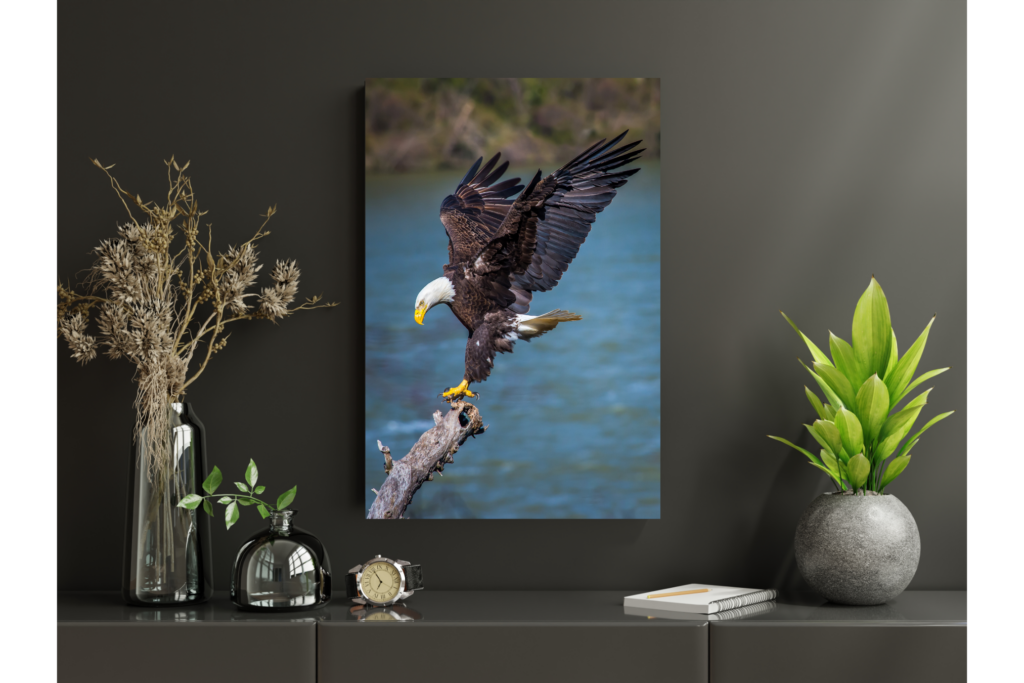
Our metal prints with float mounts are a game-changer for effortless elegance. These prints are infused directly onto a lightweight aluminum sheet that has a white base coat. They are finished with a float mount on the back, meaning they arrive ready to hang straight out of the box. No mat, no frame, no hassle. The float mount creates a subtle shadow effect, making the print appear to hover off the wall, adding depth and a contemporary flair to your space. This option is perfect for a bold wildlife shot like a bald eagle where the vivid colors and fine details pop against the metallic surface. Plus, the larger image area (no mat or frame to shrink the picture) ensures your favorite wildlife takes center stage.
Standalone Metal Prints
If you prefer a bit more customization, our standalone metal prints are just as impressive. These glossy, durable prints can be easily slipped into a simple frame of your choosing—no glass or mat required. The lack of glass eliminates distortion, letting the full depth and clarity of the image shine through uninterrupted. Like their float-mounted counterparts, standalone metal prints offer a larger image size compared to traditional matted prints, maximizing the impact of every detail. They’re a great choice for smaller wildlife images you want to frame and cluster together, creating a dynamic display that complements your larger landscapes.
Benefits of Metal Prints Over Traditional Options
Why choose metal over classic paper prints with mats and frames? For starters, metal prints are built to last. The aluminum surface resists fading, moisture, and wear—perfect for homes where nature-inspired decor needs to stand the test of time. The absence of glass means no worrying about distortion or breakage, and the clean, frameless look feels fresh and modern.
The larger image size is another major perk. Traditional prints often lose valuable space to mats and frames, shrinking the artwork itself. With metal prints, you get more of what you love—whether it’s the mysterious eyes of an owl or the expanse of a Smoky Mountain sunrise. This makes them especially striking for wildlife shots, where every detail counts, and for landscapes, where the full scope of the scene can breathe.
Inspiration for Your Space
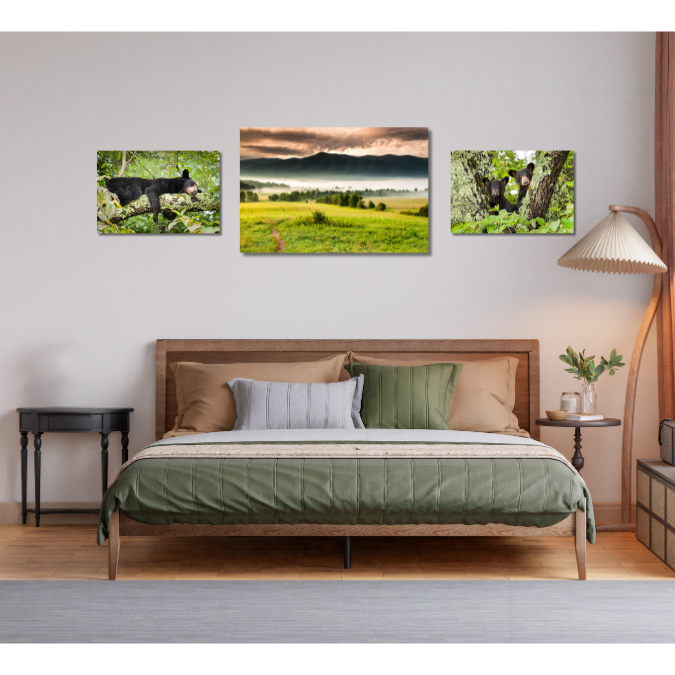
Picture this: In your bedroom, a metal print of a Cades Cove foggy morning brightening the space above your bed. Smaller float-mounted metal prints of a sleeping mother bear and her curious cubs flank each side completing the story of your Smoky Mountains.
In the hallway, a trio of standalone metal prints—a deer, a fox, and an owl—framed in simple wood frames, creates a mini gallery that draws the eye without overcrowding the narrow space.
In your cozy reading nook, a single float-mounted print of an indigo bunting on sunflowers ties the area’s cheery tone together.
These wildlife accents don’t just fill gaps—they elevate your decor, making it feel intentional and alive. They’re conversation starters, too, perfect for when guests who share your love of the Smokies visit.
Bring the Smokies Home
Incorporating wildlife prints into your home decor is a celebration of the natural world you adore. Whether you opt for the ready-to-hang float-mount or the flexibility of the standalone metal print, you’re choosing a durable, vibrant way to showcase the wildlife you enjoy. Pair them with your favorite landscape photography, and you’ve got a design scheme that’s as timeless as the wilderness itself.
Ready to transform your space? Explore our collection of Smoky Mountain wildlife and landscape metal prints today, and let the beauty of nature find its place in your home.
Learn More and Join Us in the Smoky Mountains
Want to learn more about the amazing life cycle of American Black Bears in the Smoky Mountains? Read our latest blog “The Fascinating Lives of American Black Bears” on our Spruce Photo Tours website.
Interested in photographing black bears with an experienced local photographer and guide? Join our Smoky MountainBlack Bear Workshop in May or book a private guided tour for an unforgettable one-on-one experience.
Spring in the Great Smoky Mountains is a season of renewal, where the forests awaken with vibrant wildflowers, rushing streams, and—most importantly for us—the songs and sights of countless birds. Straddling the Tennessee-North Carolina border, this national park is a biodiversity hotspot, hosting over 240 bird species across its varied elevations and habitats. Nearly 120 species breed in the park, including 52 Neotropical migrants. The elevation gradient—from 840 feet at Abrams Creek to 5,500 feet at Newfound Gap—creates microclimates hosting lowland songbirds and highland boreal species alike. Add blooming wildflowers and milder weather, and it’s a birder’s and photographer’s dream.
Spring (March through May) is prime time to witness both resident and migratory birds, including some rare gems that make the Smokies a must-visit destination. Whether you’re aiming to capture a stunning photo or add a new species to your life list, here’s a guide to 15 standout birds frequenting the Smokies in spring.
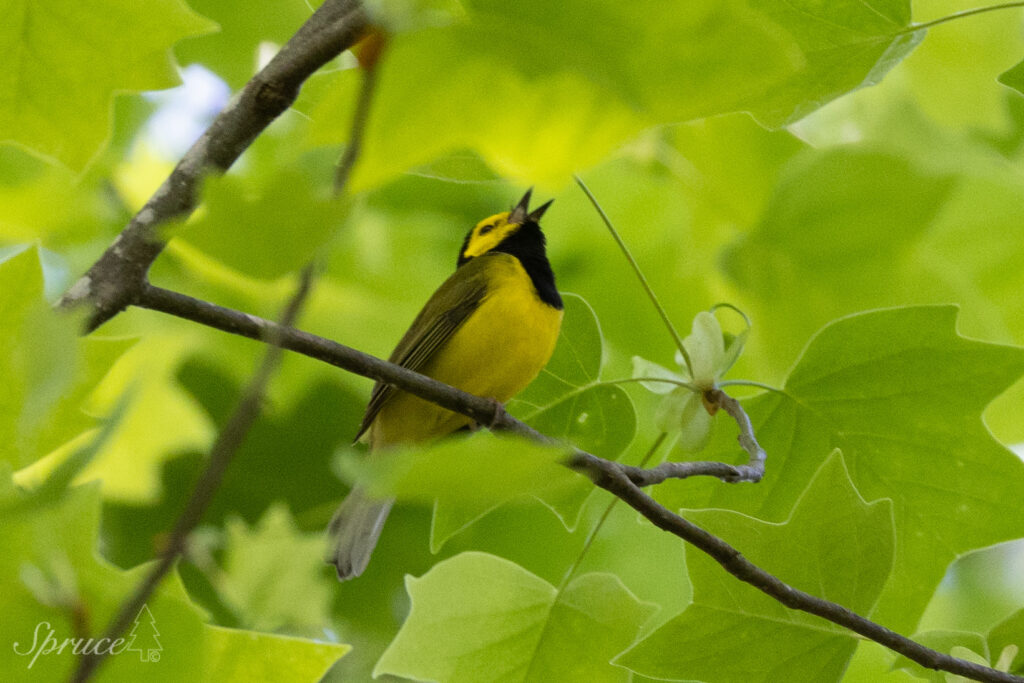
Hooded Warbler
Interesting Fact: The male Hooded Warbler’s striking black hood, framing a bright yellow face, isn’t just for show—it’s a signal of dominance. Studies show that males with larger hoods often hold better territories.
Tip: Listen for its clear, ringing “ta-wit ta-wit ta-wit tee-yo” song in dense undergrowth along trails like the Sugarlands Valley Nature Trail.
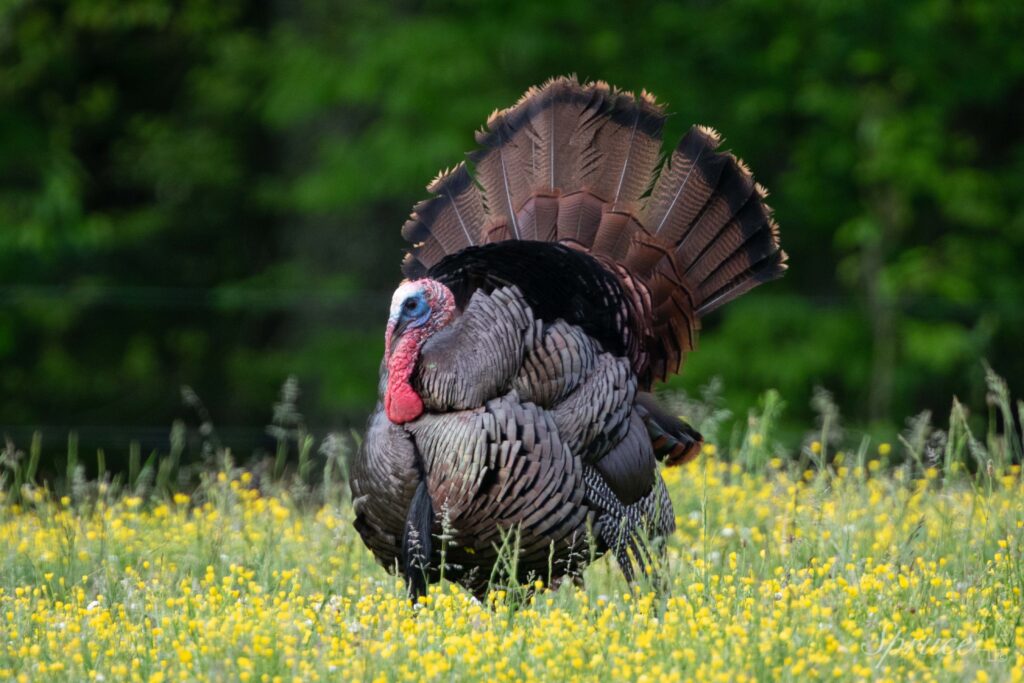
Wild Turkey
Interesting Fact: One of North America’s largest birds, the Wild Turkey struts through open fields and forest edges in spring, with males fanning iridescent tails in courtship displays. Conservation efforts, like the Migratory Bird Treaty Act of 1918, revived their numbers after near collapse.
Birding Tip: The males’ echoing gobble is a spring hallmark—April is peak display season. Scan open areas early and capture their strut in a field of flowers in Cades Cove.
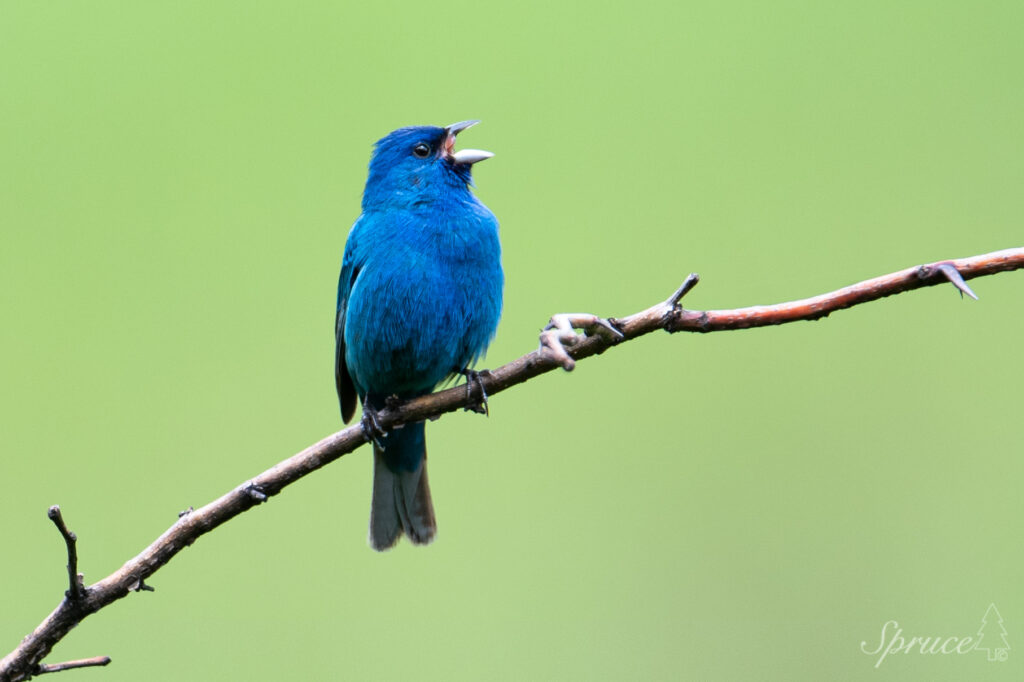
Indigo Bunting
Interesting Fact: The male’s vibrant blue isn’t pigment—it’s light diffraction through feather structures, glowing brightest in direct sun.
Birding Tip: Spot them in open woodlands or along Cades Cove Loop Road, singing from exposed perches.
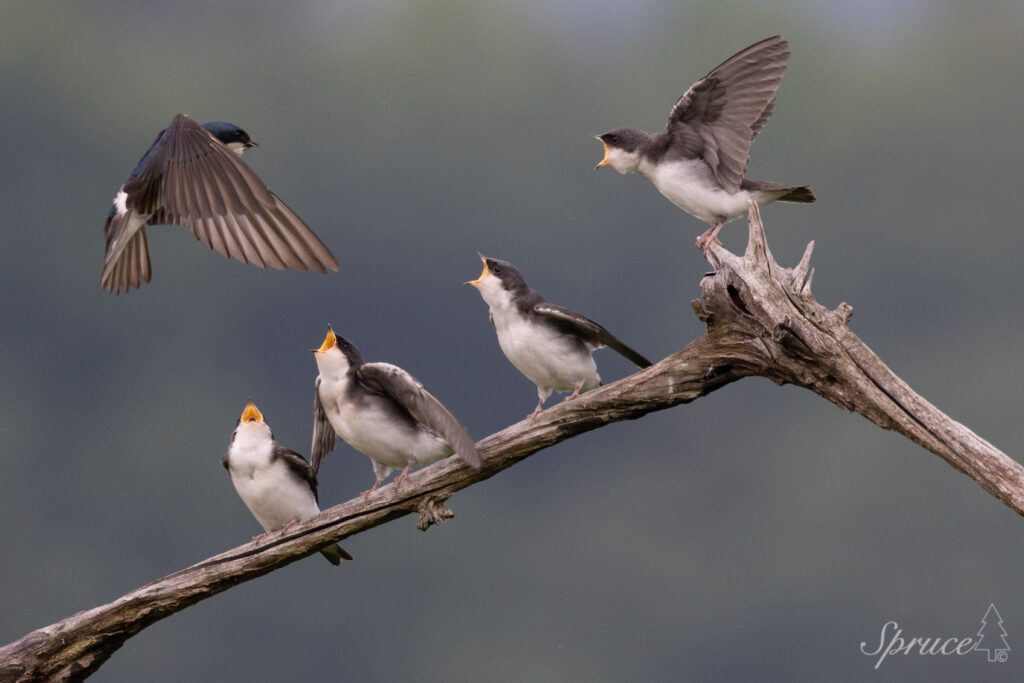
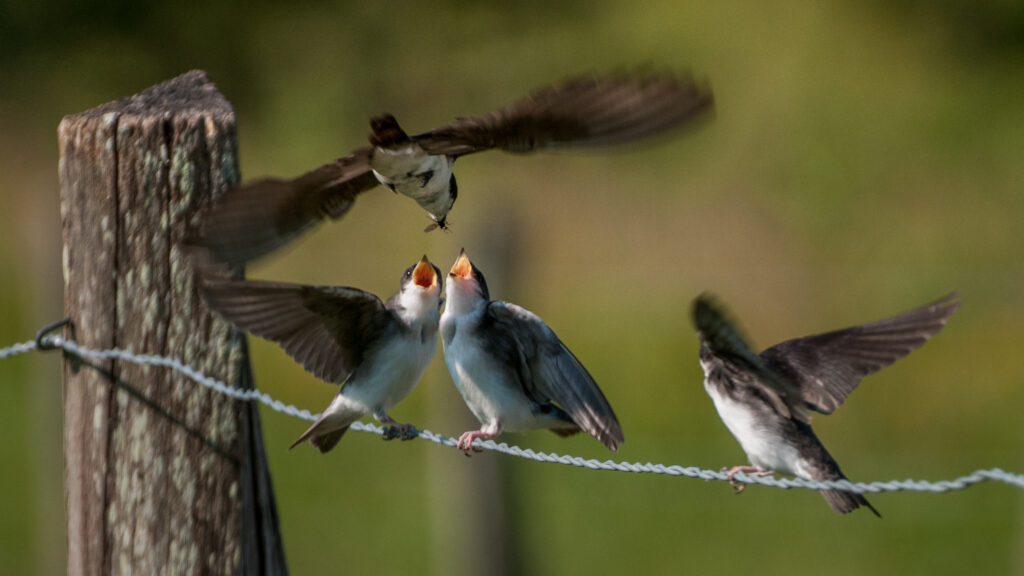
Tree Swallow
Interesting Fact: These iridescent beauties are aerial acrobats, catching insects mid-flight. The fledglings lack the adults’ blue color on their backs.
Birding Tip: Watch for them swooping over fields near the Oconaluftee Visitor Center.
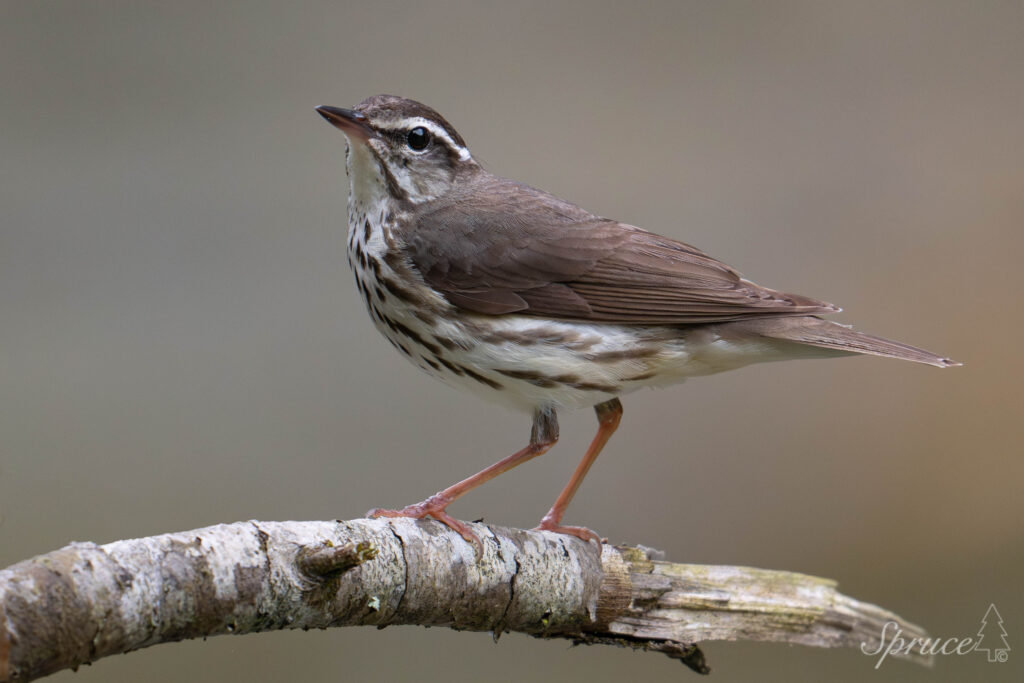
Louisiana Waterthrush
Interesting Fact: Its loud, cascading song mimics the rushing streams it inhabits—one of spring’s earliest warbler arrivals.
Birding Tip: Seek it along streams like Little River, where it bobs its tail incessantly.
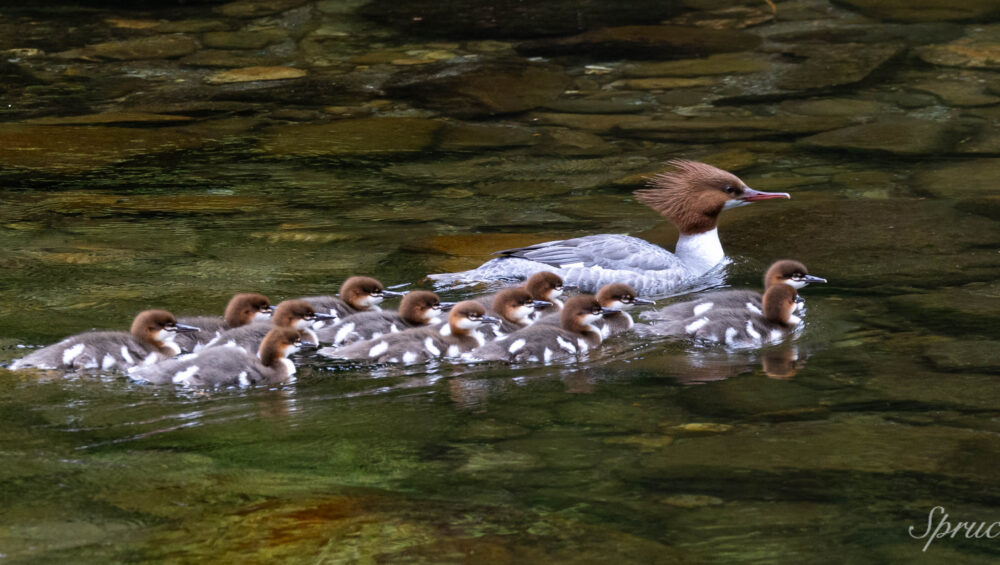
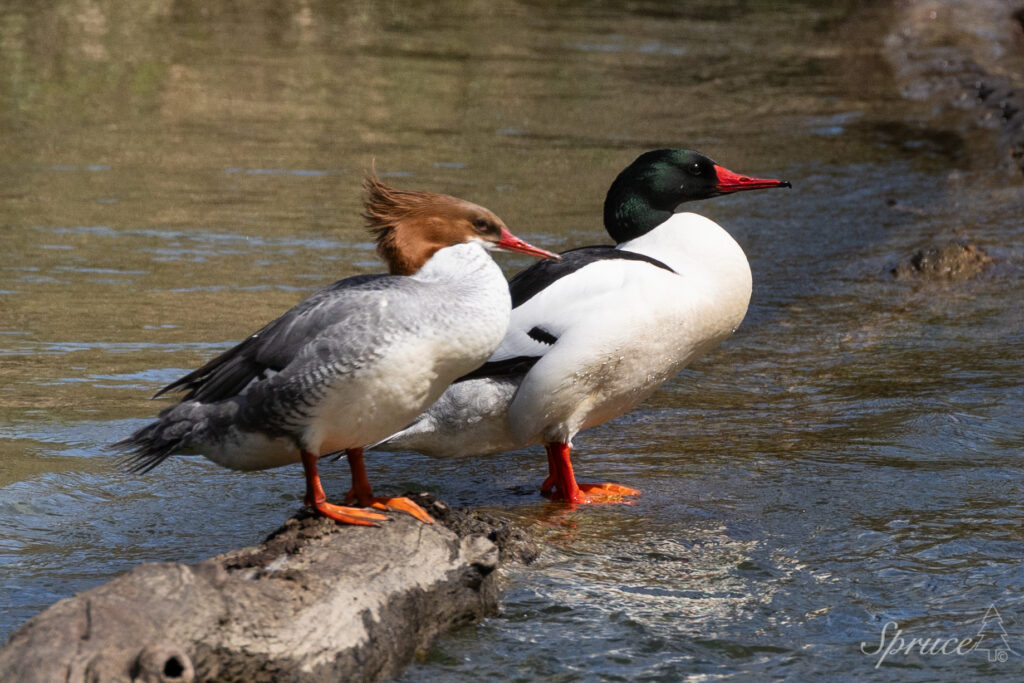
Common Merganser
Interesting Fact: This diving duck’s serrated bill, dubbed a “sawbill,” snags fish with ease. Females lead ducklings out of the nest into the river within 24 hours of hatching.
Birding Tip: Look for them in the Little River Gorge.
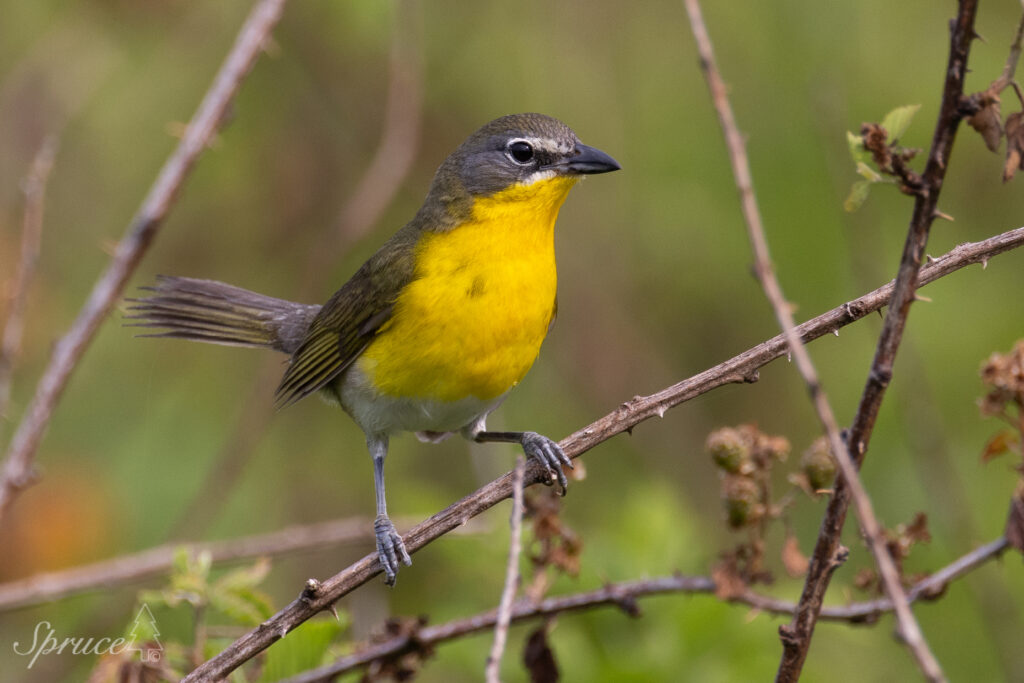
Yellow-breasted Chat
Interesting Fact: Once classified as a warbler, this mimic’s wild repertoire includes whistles, cackles, and meows—think avian jazz.
Birding Tip: Find it in thickets near Newfound Gap Road; its ventriloquist-like calls confuse direction.
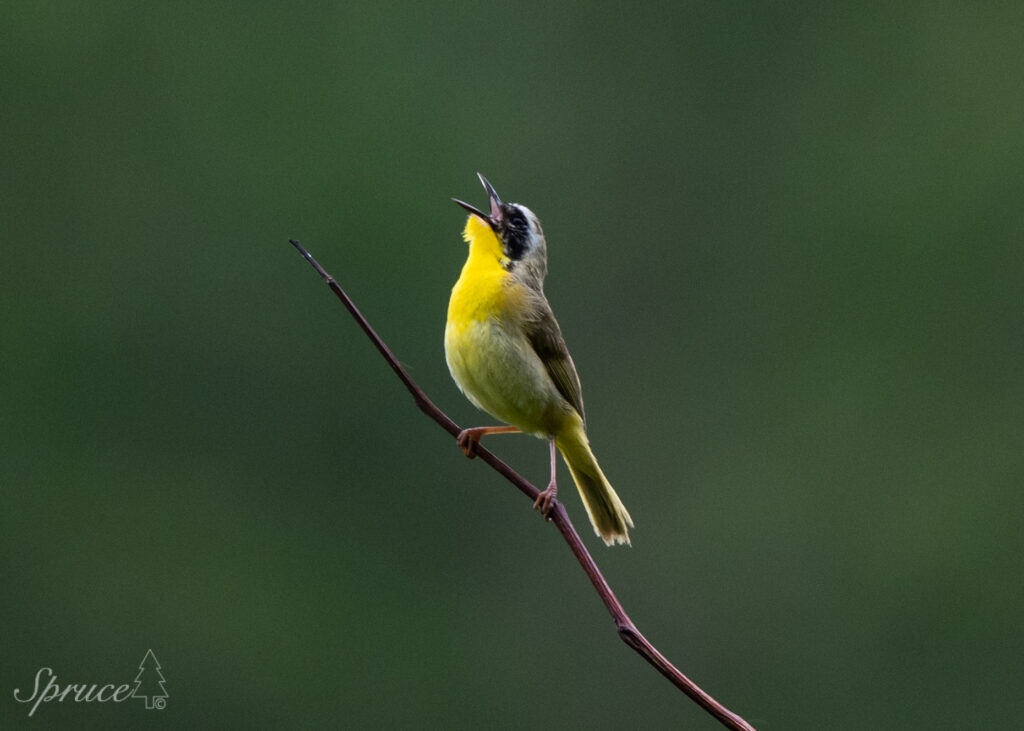
Common Yellowthroat
Interesting Fact: The male’s black mask and “witchety-witchety” song make it a marsh maestro. It’s one of the most widespread warblers in North America.
Birding Tip: Check wetlands near Cades Cove; listen for its distinctive call.
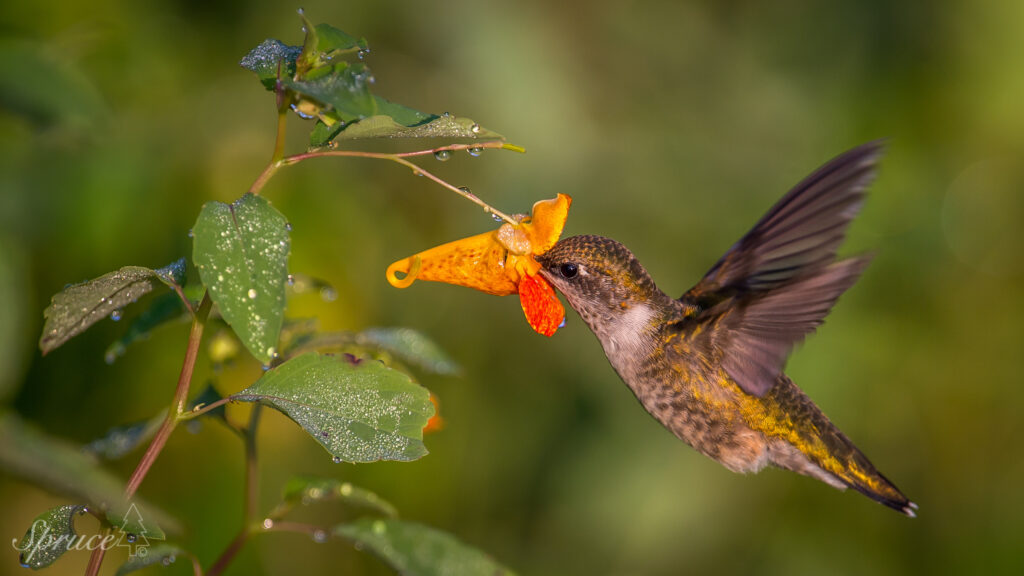
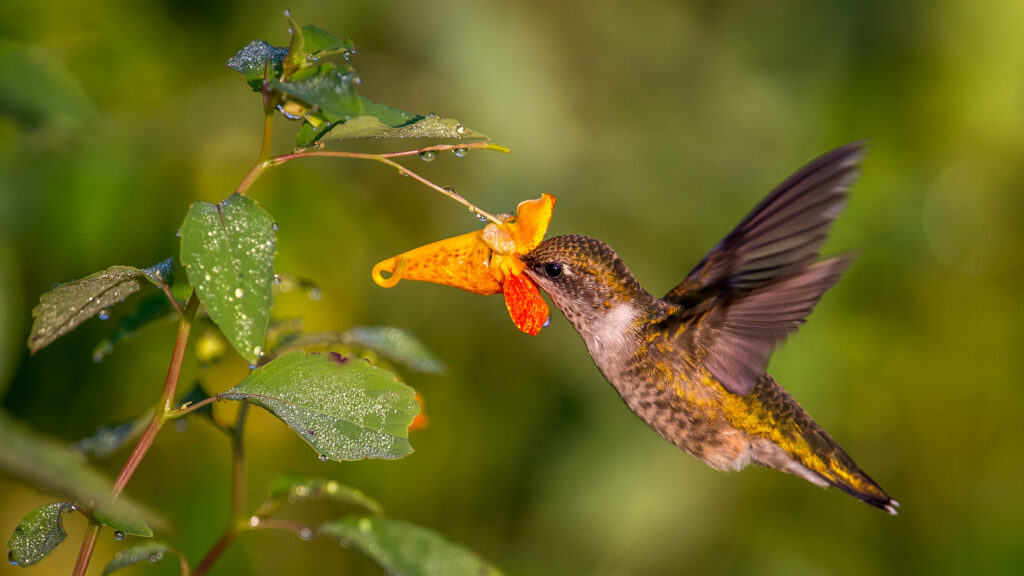
Ruby-throated Hummingbird
Interesting Fact: Weighing less than a nickel, this tiny marvel beats its wings 53 times per second and migrates 500 miles nonstop across the Gulf of Mexico.
Birding Tip: Look for them in areas with Jewelweed and other flowers.
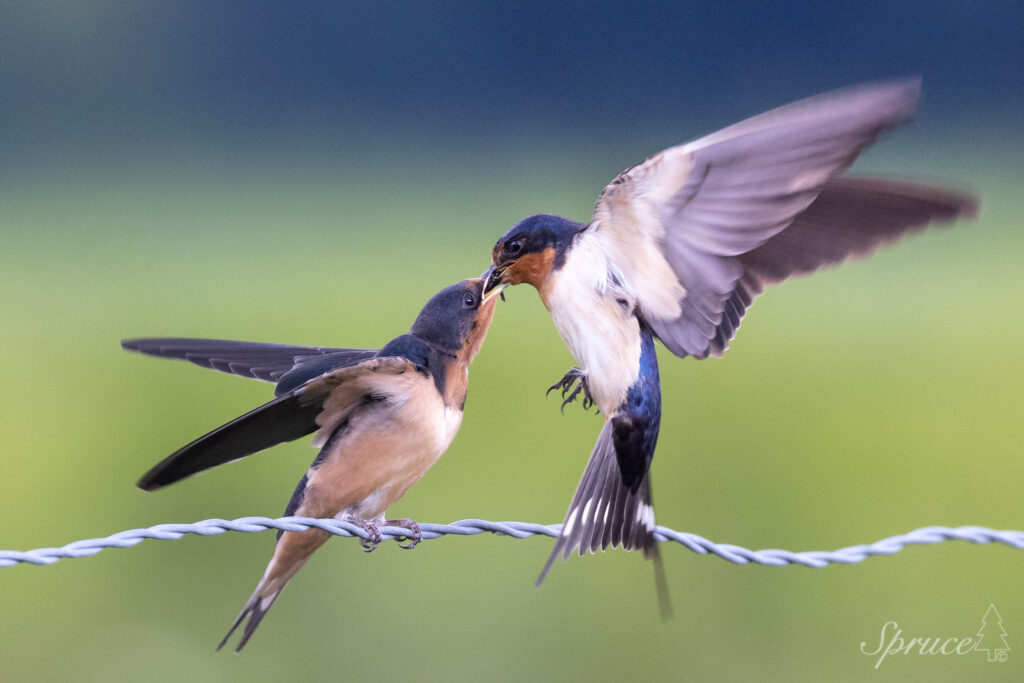
Barn Swallow
Interesting Fact: Barn Swallows are endurance fliers, capable of traveling up to 11,000 miles round-trip during migration between North America and their South American wintering grounds. They’ve been clocked flying at speeds up to 24 mph while snagging insects mid-air.
Birding Tip: Watch them skim fields near historic barns in Cades Cove.
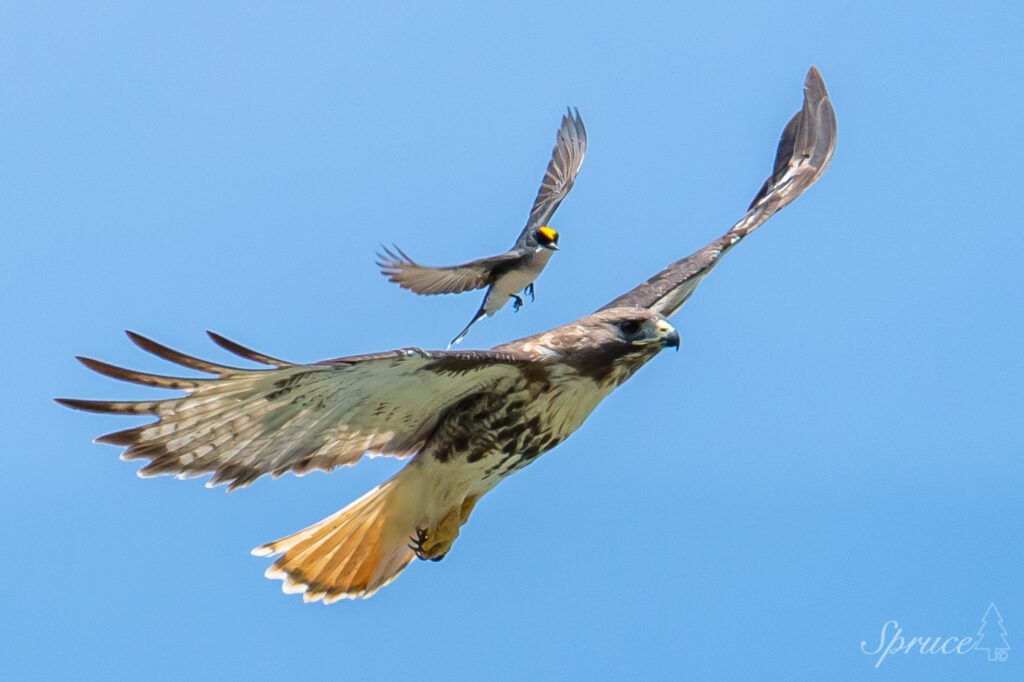
Eastern Kingbird
Interesting Fact: This feisty flycatcher defends its territory by chasing off hawks—its hidden red crown flares in aggression.
Birding Tip: Look in open areas like along Sparks Lane and Hyatt Lane; its “dzeet” call stands out.
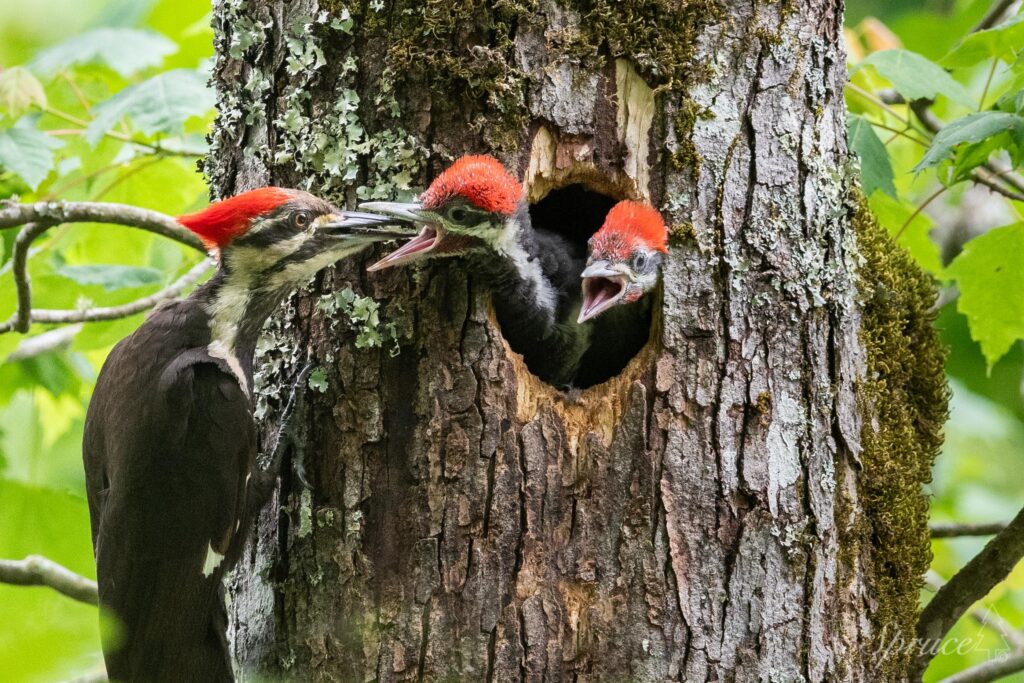
Pileated Woodpecker
Interesting Fact: This crow-sized bird’s rectangular holes and Woody Woodpecker-like laugh echo through the forest. It’s a keystone species, creating homes for others.
Birding Tip: Listen for drumming in wooded areas, and look for them on downed logs and standing dead trees.
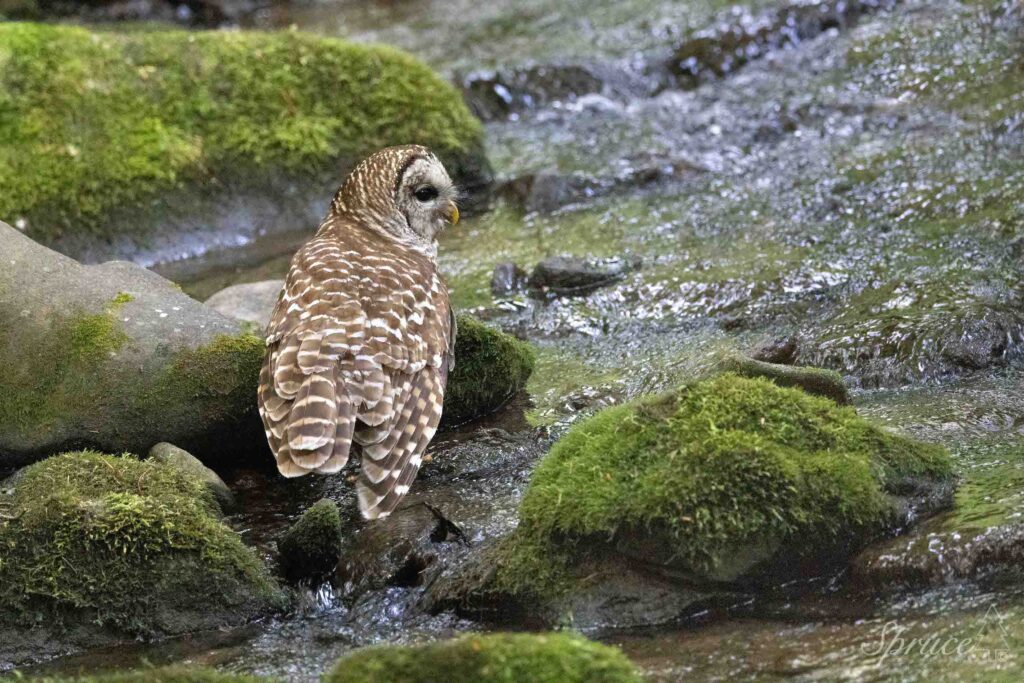
Barred Owl
Interesting Fact: Its “who cooks for you” hoot is a Smokies classic. It can catch prey in total darkness using sound alone.
Birding Tip: Barred Owls are most vocal and active during twilight hours. Their deep, rhythmic calls carry far in the Smokies’ dense woods. Stand still in hardwood forests near streams or swamps—prime habitat—and let the sound guide you.
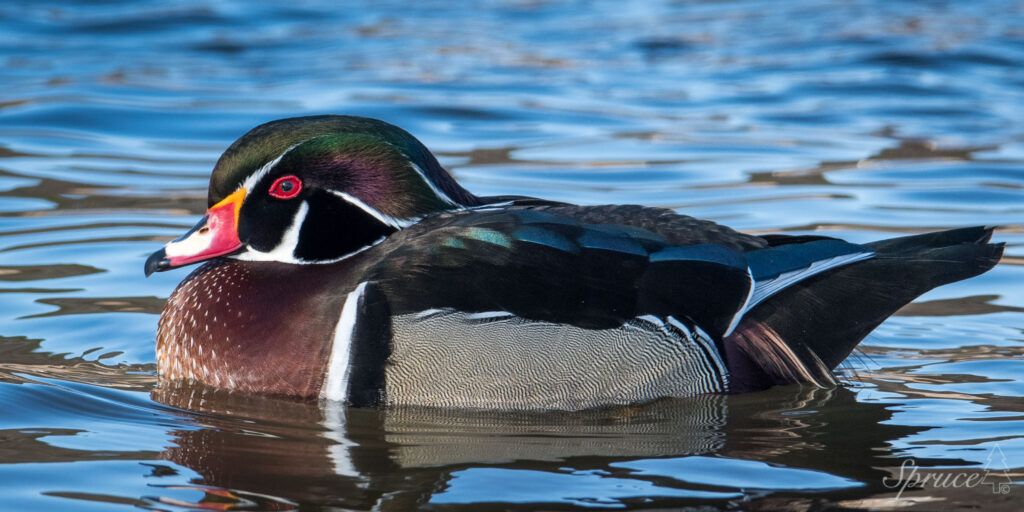
Wood Duck
Interesting Fact: North America’s most colorful duck, males sport a psychedelic palette. Ducklings leap from nests up to 50 feet high within a day of hatching.
Birding Tip: They favor wooded swamps, so check ponds in wetland areas.
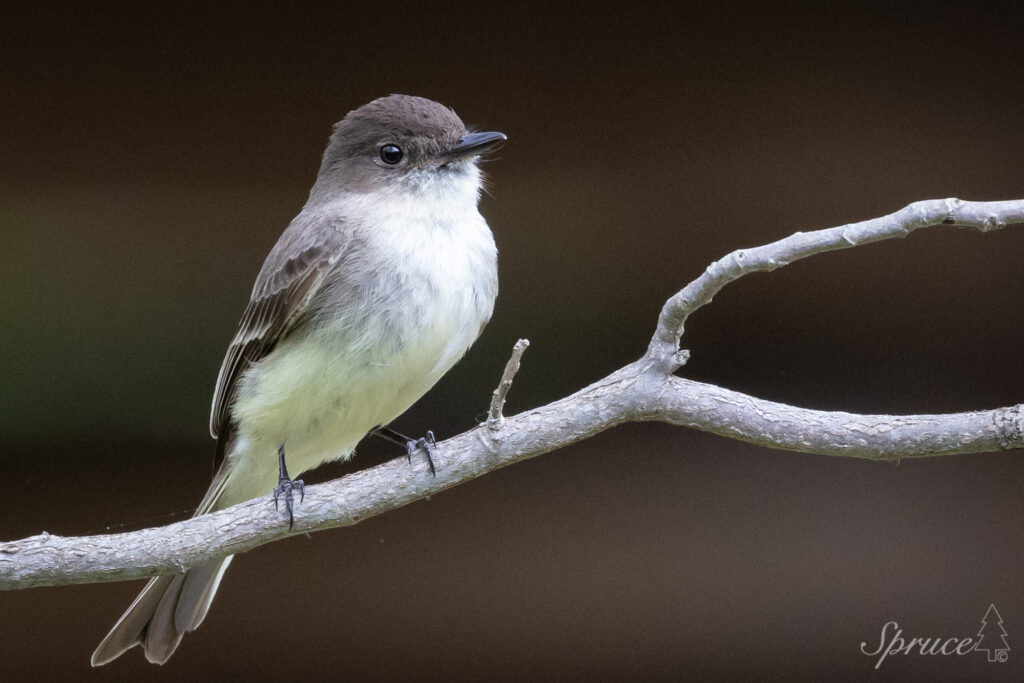
Eastern Phoebe
Interesting Fact: The first bird named by Audubon, it tail-wags like a metronome and was a pioneer in bird-banding studies.
Birding Tip: Listen for its distinctive raspy “fee-bee” call. Phoebes are sit-and-wait hunters, returning to the same low perch after short flycatching sorties. Find a spot with a clear view of a favorite perch and wait for it to return.
Getting the Shot
With quick moving subjects, variable lighting, and long distances, bird photography challenges the best wildlife photographers. Here are some tips to help ensure a successful bird photography venture in the Smokies.
Bring the right gear. A good pair of binoculars is a must have to spot birds. Bring a long lens to capture birds at a distance. Pack rain gear for the unpredictable Spring weather. Use a harness such as Rapid Strap or Cotton Carrier for your camera so that you can quickly go back and forth between your binoculars and camera.
Be in the right place at the right time. The prime time for bird photography is dusk and dawn (the first and last two hours of the day). The right place will depend on the bird species you are targeting. For example, many warblers will be found in the tree canopy where they are feeding on insects, while Swallows, can be found flying over open fields. Eastern Kingbird and Eastern Phoebe will be found hawking insects from a favorite tree branch.
Pay attention to the direction of lighting in open areas such as along roads. For example, the crossroads in Cades Cove run north and south. So in the morning you want to be shooting to the west. In the afternoon you want to be shooting to the east.
Male birds are typically easier to photograph, because they are perched singing declaring their territory and attracting females. Look for them atop bushes and small trees. They will also take advantage of fence posts alongside the road.
A rainy day offers great opportunities. After a rain look for puddles on dirt roads to capture birds bathing and drinking.
When photographing birds in ponds or rivers, get low at eye-level with the subject to enhance the composition of your image.
Final Thoughts
The Great Smoky Mountains in spring are a symphony of feathers and song. For photographers, it’s a canvas of color and motion; for birders, it’s a checklist begging to grow. So, grab your gear, tune your ears, and step into this avian wonderland. In the Smokies, spring isn’t just a season, it’s a spectacle. These tips are a great starting point for birders and photographers. If you would like hands on private instruction from an expert to capture the spectacle, book a private tour with me. Or to take your bird photography a step further, join a small group of like-minded photographers April 15-18 for our Smoky Mountain Birds Workshop.
References:
Cornell Lab of Ornithology. All About Birds. www.allaboutbirds.org.
National Audubon Society. Audubon Field Guide. www.audubon.org.
National Park Service. Birds Checklist – Great Smoky Mountains. www.nps.gov/grsm.
“Birding in the Great Smoky Mountains,” Smoky Mountain Living, 2018.
“Your Guide to Viewing the Birds of the Smoky Mountains,” Visit My Smokies, 2017.
“40 Birds You Can See in the Great Smoky Mountains National Park,” Avian Report, 2020.
“Birds,” Great Smoky Mountains National Park, National Park Service, 2024.
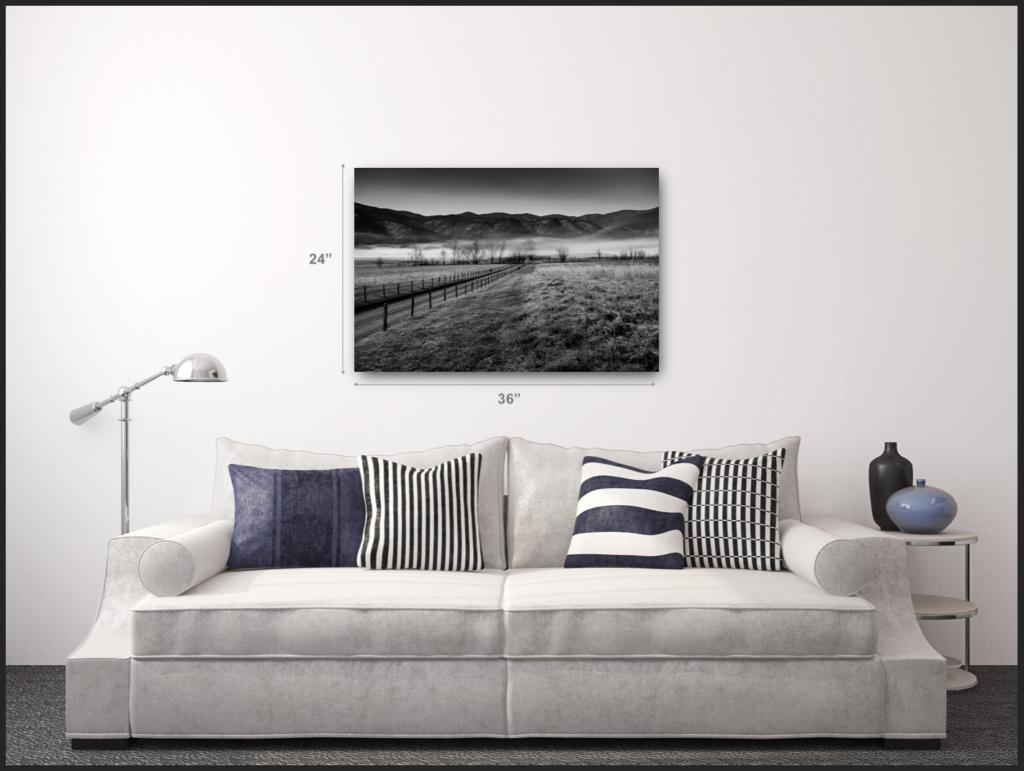
Nature and wildlife photography can transform any room, adding personality and visual interest. Our top quality metal photographic prints, create wall decor with incredible color and depth. You feel like you can walk into the scene or reach out and touch the wildlife. The versatility of metal prints allows you to frame photographic art to match existing decor or hang it with a float mount which offers a minimalist look complementing any decor.
Each image by nature and wildlife photographer, Barry Spruce, captures a moment in the Smokies that will enhance any room in your home or office and will be a focal point admired by everyone. However, deciding which images and what size best fits your room or area can seem overwhelming. So here are some tips to help you transform that empty wall into a nature inspired masterpiece with Smoky Mountain photography.
1. Sizing It Right
Large rooms: You can go big with statement pieces or group images in odd numbers to fill a large space
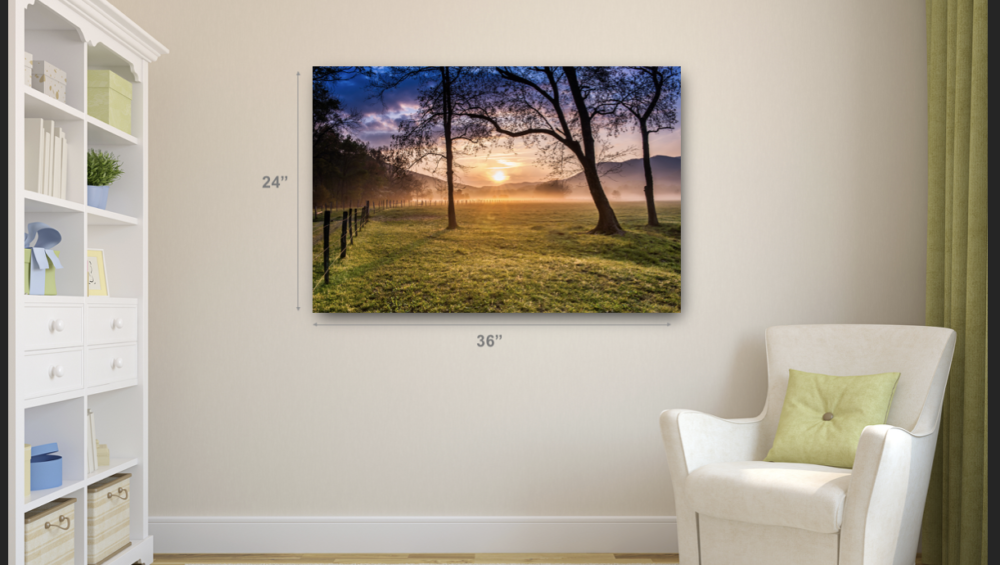
Large rooms / spaces: Choose a landscape (24”x36”) for a large centerpiece and complement it with wildlife or other landscape images in smaller sizes (16”x24” and 12”x18”)
Living rooms: Mid-size prints (24″ x 36″ to 30″ x 40″) work well
Bedrooms: Smaller prints (16″ x 24″ to 12″ x 18″) for a more intimate feel
Above furniture: Choose art that’s 2/3 to 3/4 the width of the furniture (for example, a 24”x36” over a couch or headboard)
2. Layout Ideas
Gallery wall: Mix different sizes for an eclectic look
Symmetrical grid: Use identical frames for a clean, organized appearance
Focal point: One large landscape image as the centerpiece complemented with other smaller landscapes and/or wildlife
Experiment with layouts: Cut out paper templates and arrange them on the wall with painter’s tape to experiment with layouts
3. Consider the Room or Area's Purpose
Office: Inspiring landscapes complemented with wildlife
Bedroom: Calming landscape scenes
Children’s rooms: Cute wildlife such as deer fawn mixed with landscapes for a fun environment
Over a fireplace: Select a winter scene for part of the year and rotate with a summer scene
4. Play with Frames
Consistent frames for a cohesive look
Mix frame styles for an eclectic vibe
Barnwood / reclaimed wood for a rustic look
Try frameless metal prints with a float mount for a modern aesthetic
5. Mind the Spacing
Leave 2-3 inches between frames in a gallery wall
Hang art at eye level (57-60 inches from the floor to the center of the piece)
6. Match Your Style
Modern: Black and white photography, monochromatic, or minimalist compositions
Rustic: Nature scenes with barns, cabins, or other rustic buildings
Eclectic: Mix various landscape, architectural, and wildlife subjects
Lastly and most importantly, fill your home and office with images that you love and that bring the beauty of nature into your indoor spaces. Nature inspired wall art can be used to bring a serene feeling to your room or a sense of adventure and inspiration. Plus, an image can match any decor by changing the frame style, by using a float mount, or by mixing styles.
If we can assist you in selecting your next Smoky Mountain metal photographic print, please, let us know. We are happy to help!
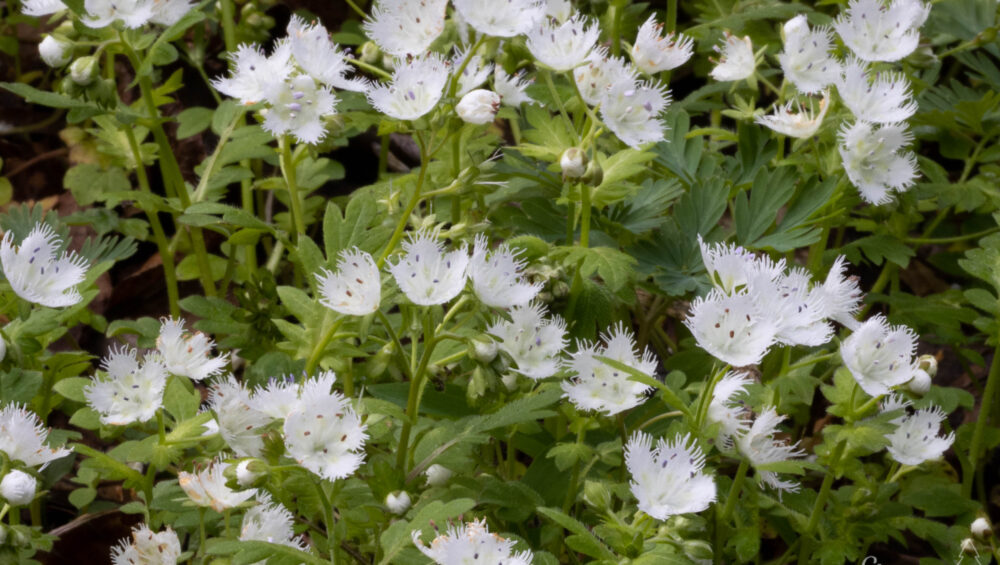
Spring is in the air and the wildflowers are adorning the Smoky Mountains. The earliest ephemerals have already begun unfurling their leaves and blooms. They will leaf out, flower, and fruit within a short two-month period before the trees leaf out. But the show doesn’t end there as the Smokies are home to over 1,500 species of flowering plants. Wildflowers continue through summer and fall. Variations in elevation, rainfall, temperature, and geology create an ideal habitat for an amazing diversity of plants. In fact, there are over 20 flowering plants that are only found in the Southern Appalachians. Check out the infographic below for more fun facts about Smoky Mountain wildflowers.
Photography subjects are all around us. When you are a beginner, sometimes it can actually be overwhelming to decide what to start photographing. I, of course, focus on nature and wildlife photography. One of my favorite wildlife subjects is birds. I enjoy learning about them, the challenge of photographing them, and teaching others about them. In this Quick Tips blog, I will give some tips on getting started photographing our feathered friends.
There are many benefits of learning how to photograph birds. A few include
Getting outside and enjoying nature
Your subject is everywhere, even cities and your own backyard
For birders, good photographs help with bird identification and documentation
All ages can enjoy it
Provides a fun challenge
How to Get Started
Begin by learning some basics about your subject. Knowing basic behaviors and characteristics will help you appreciate your subject more and help you to identify, locate, and photograph them.
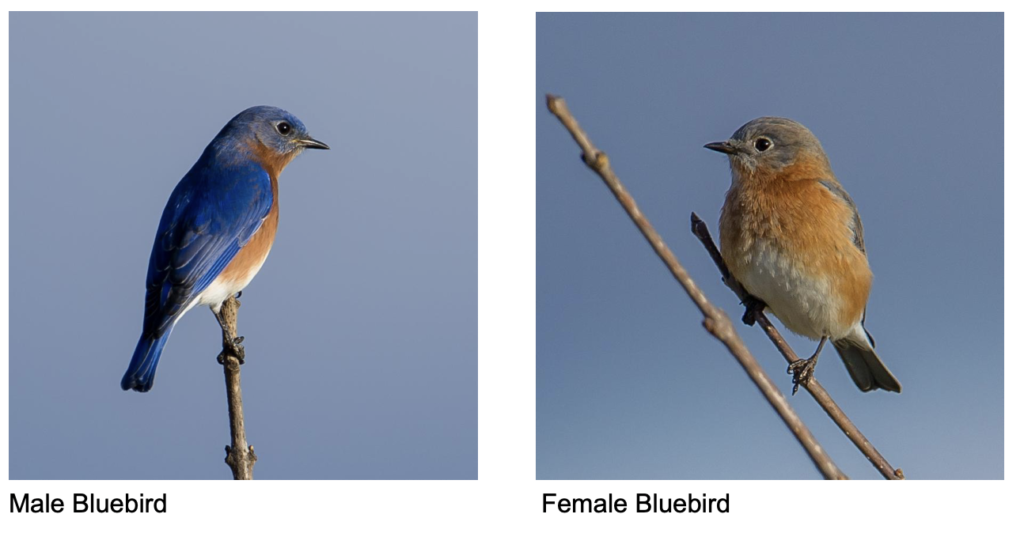
Identification Help
Local year-round birds are easiest to start identifying and photographing. Migrating birds are fairly predictable, so you can learn the times of the year that various birds migrate through your area. Male birds are usually more easily identified because they are more colorful and vocal. Females and young males can look very similar.
There are many great tools available to begin identifying birds and to learn more about them. The Cornell Lab Merlin app is a free tool that I highly recommend. A good bird guide book is another excellent resource. Many are available including ones by Peterson, Sibley, Audubon, and National Geographic. As you become more involved in bird photography, you may also enjoy joining a birding and/or photography club or group. Research your area for Ornithological Societies, Camera Clubs, and Birding Social Media Groups.
Basic Behaviors
Learning basic behaviors such as what birds eat and their preferred habitats will help you draw them to your yard, know where to look for them on location, predict their behavior, and get better photos. Backyard bird feeders will attract different birds based on the types of feed and seed that you use. To attract many different birds, use a variety of seeds and use suet for woodpeckers. Consider planting trees, shrubs, and flowers to attract birds. Hummingbirds, for example, will be drawn to nectar producing flowers. While other types of birds will eat the seeds produced by flowering plants. All birds will benefit from having cover and nesting places in backyard plantings.
Hummingbird feeding on Jewelweed
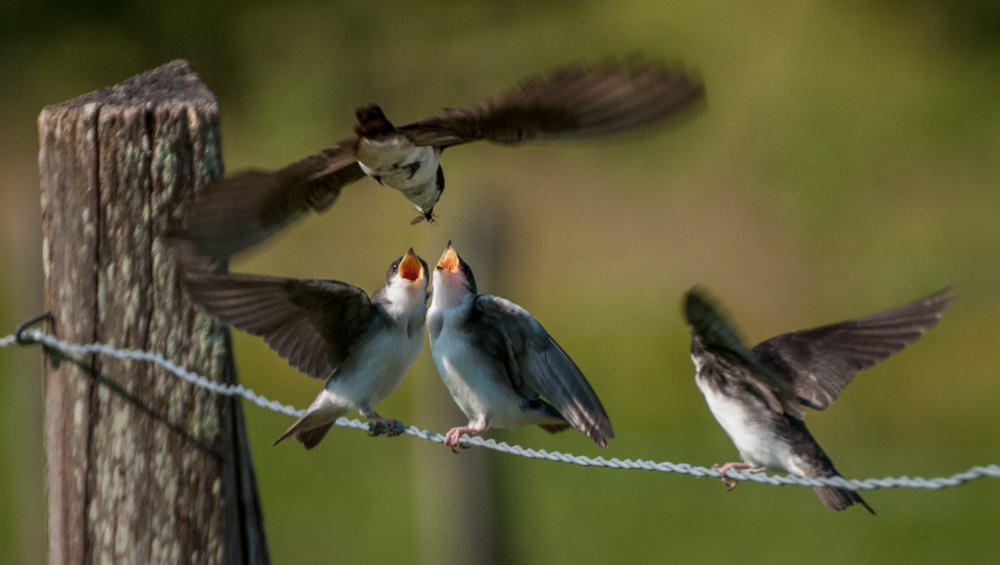
Some birds will feed predominantly on insects, and you can use this knowledge to get photographs of them catching a meal in flight or delivering an insect to their young as in the image below.
Meals on Wings
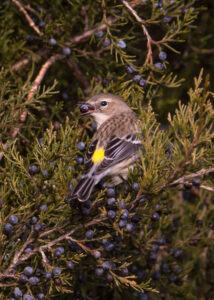
Other birds that feed on berries will be found in trees and shrubs. So, looking for likely food sources can result in great photos of them eating colorful berries.
Berries for Lunch
Gear to Get Started
As you get started photographing birds, you will need some basic gear. A good pair of binoculars tops the list of recommended gear. There are many brands available. Look for good quality 8×42 binoculars. Binoculars will help you find and identify the birds that you want to photograph.
As with binoculars there are many camera brands available. Look for a digital (DSLR) camera from a respected manufacturer such as Canon, Nikon, Sony, Fuji, Panasonic. You will want a camera and lenses with vibration reduction (VR) and image stabilization (IS) capabilities. A good birding lens would be a 200mm or higher. Zooms are very versatile and can be used, also. Other equipment that will be handy is a tripod and a monopod with a Gimbal tripod head.
Photographing
Bird photography is fun and challenging. You are frequently photographing a moving subject that at times is quite small and in variable lighting. Below are some tips to follow as you practice photographing birds. Keep in mind that the key to progress is practice. Since birds are in nearly every environment, you can practice regularly even if it is in your backyard or a nearby city park. As you practice, the techniques become habit, and as you adventure into different settings to photograph birds your results will be better and better.
Photography Tips:
Practice looking back and forth from camera to subject with your naked eye
Practice panning (moving camera/lens the same speed as the subject) as you photograph the moving subject
Study bird habits to anticipate their movements to capture action shots
Be prepared – try to position yourself with better lighting such as sun behind you to help your images show better detail and color
Shoot flying subjects as they are coming slightly toward you (not flying away)
For static subjects shoot at lowest F Stop (f/2.8-f/5.6) and speeds equivalent to lens length (1/400-1/800)
For moving subjects shoot at a higher F Stop (f/6.3-f/8) and higher speeds (1/800-1/1600)
Use your lowest ISO possible for best results
Use single point Autofocus for static subjects
Use small group Autofocus for flying subjects
In conclusion, learning bird photography is a fun and challenging hobby that anyone can get started doing. Download a bird app such as Merlin by Cornel Lab to your phone and begin identifying the birds in your neighborhood. Improve your yard with feeders and simple plantings to encourage birds, and you will be able to easily practice your photography in your backyard. Get started with some basic camera gear and binoculars. Soon you will find yourself enjoying your bird photography as much as I do.
When visiting the Great Smoky Mountains, you’ll want to take advantage of the beautiful scenery and take some amazing photos. Here are a few tips to help you get the most out of your Smoky Mountain photography.
1. Take advantage of the golden hour
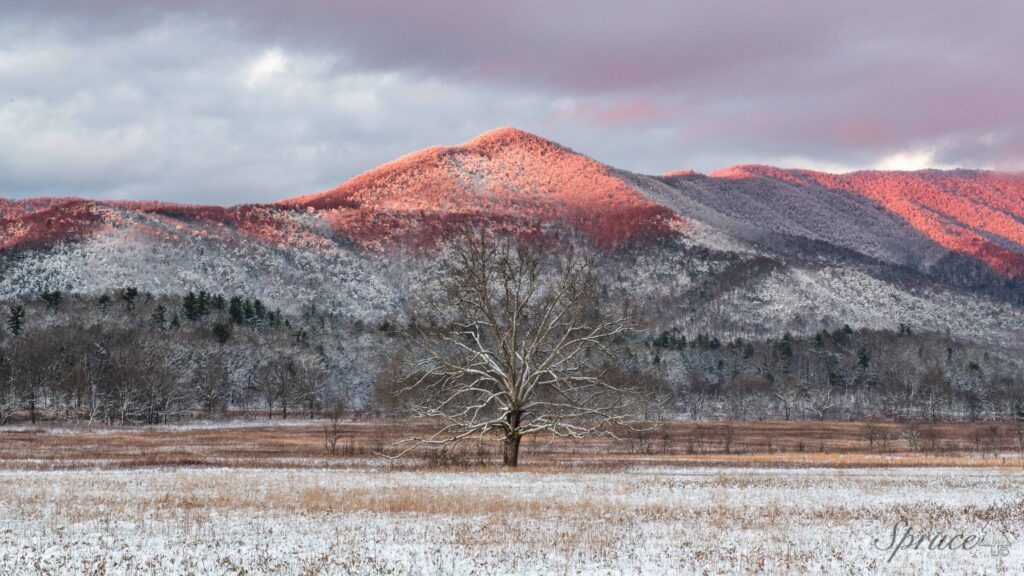
One of the best times to capture great landscape and wildlife photography is during golden hour. This is the time shortly after sunrise or shortly before sunset. The lighting is softer and warmer during golden hour, and the mountains tend to take on a beautiful, golden glow. Here are a few pointers for taking amazing photos during golden hour. Position the rising or setting sun behind you. Watch for warm tones hitting your subject. Use a tripod to ensure sharp images. Golden hour is a special time of day, so make sure to savor the moment and take in the stunning views and photographic opportunities.
Rare alpenglow in Cades Cove during golden hour.
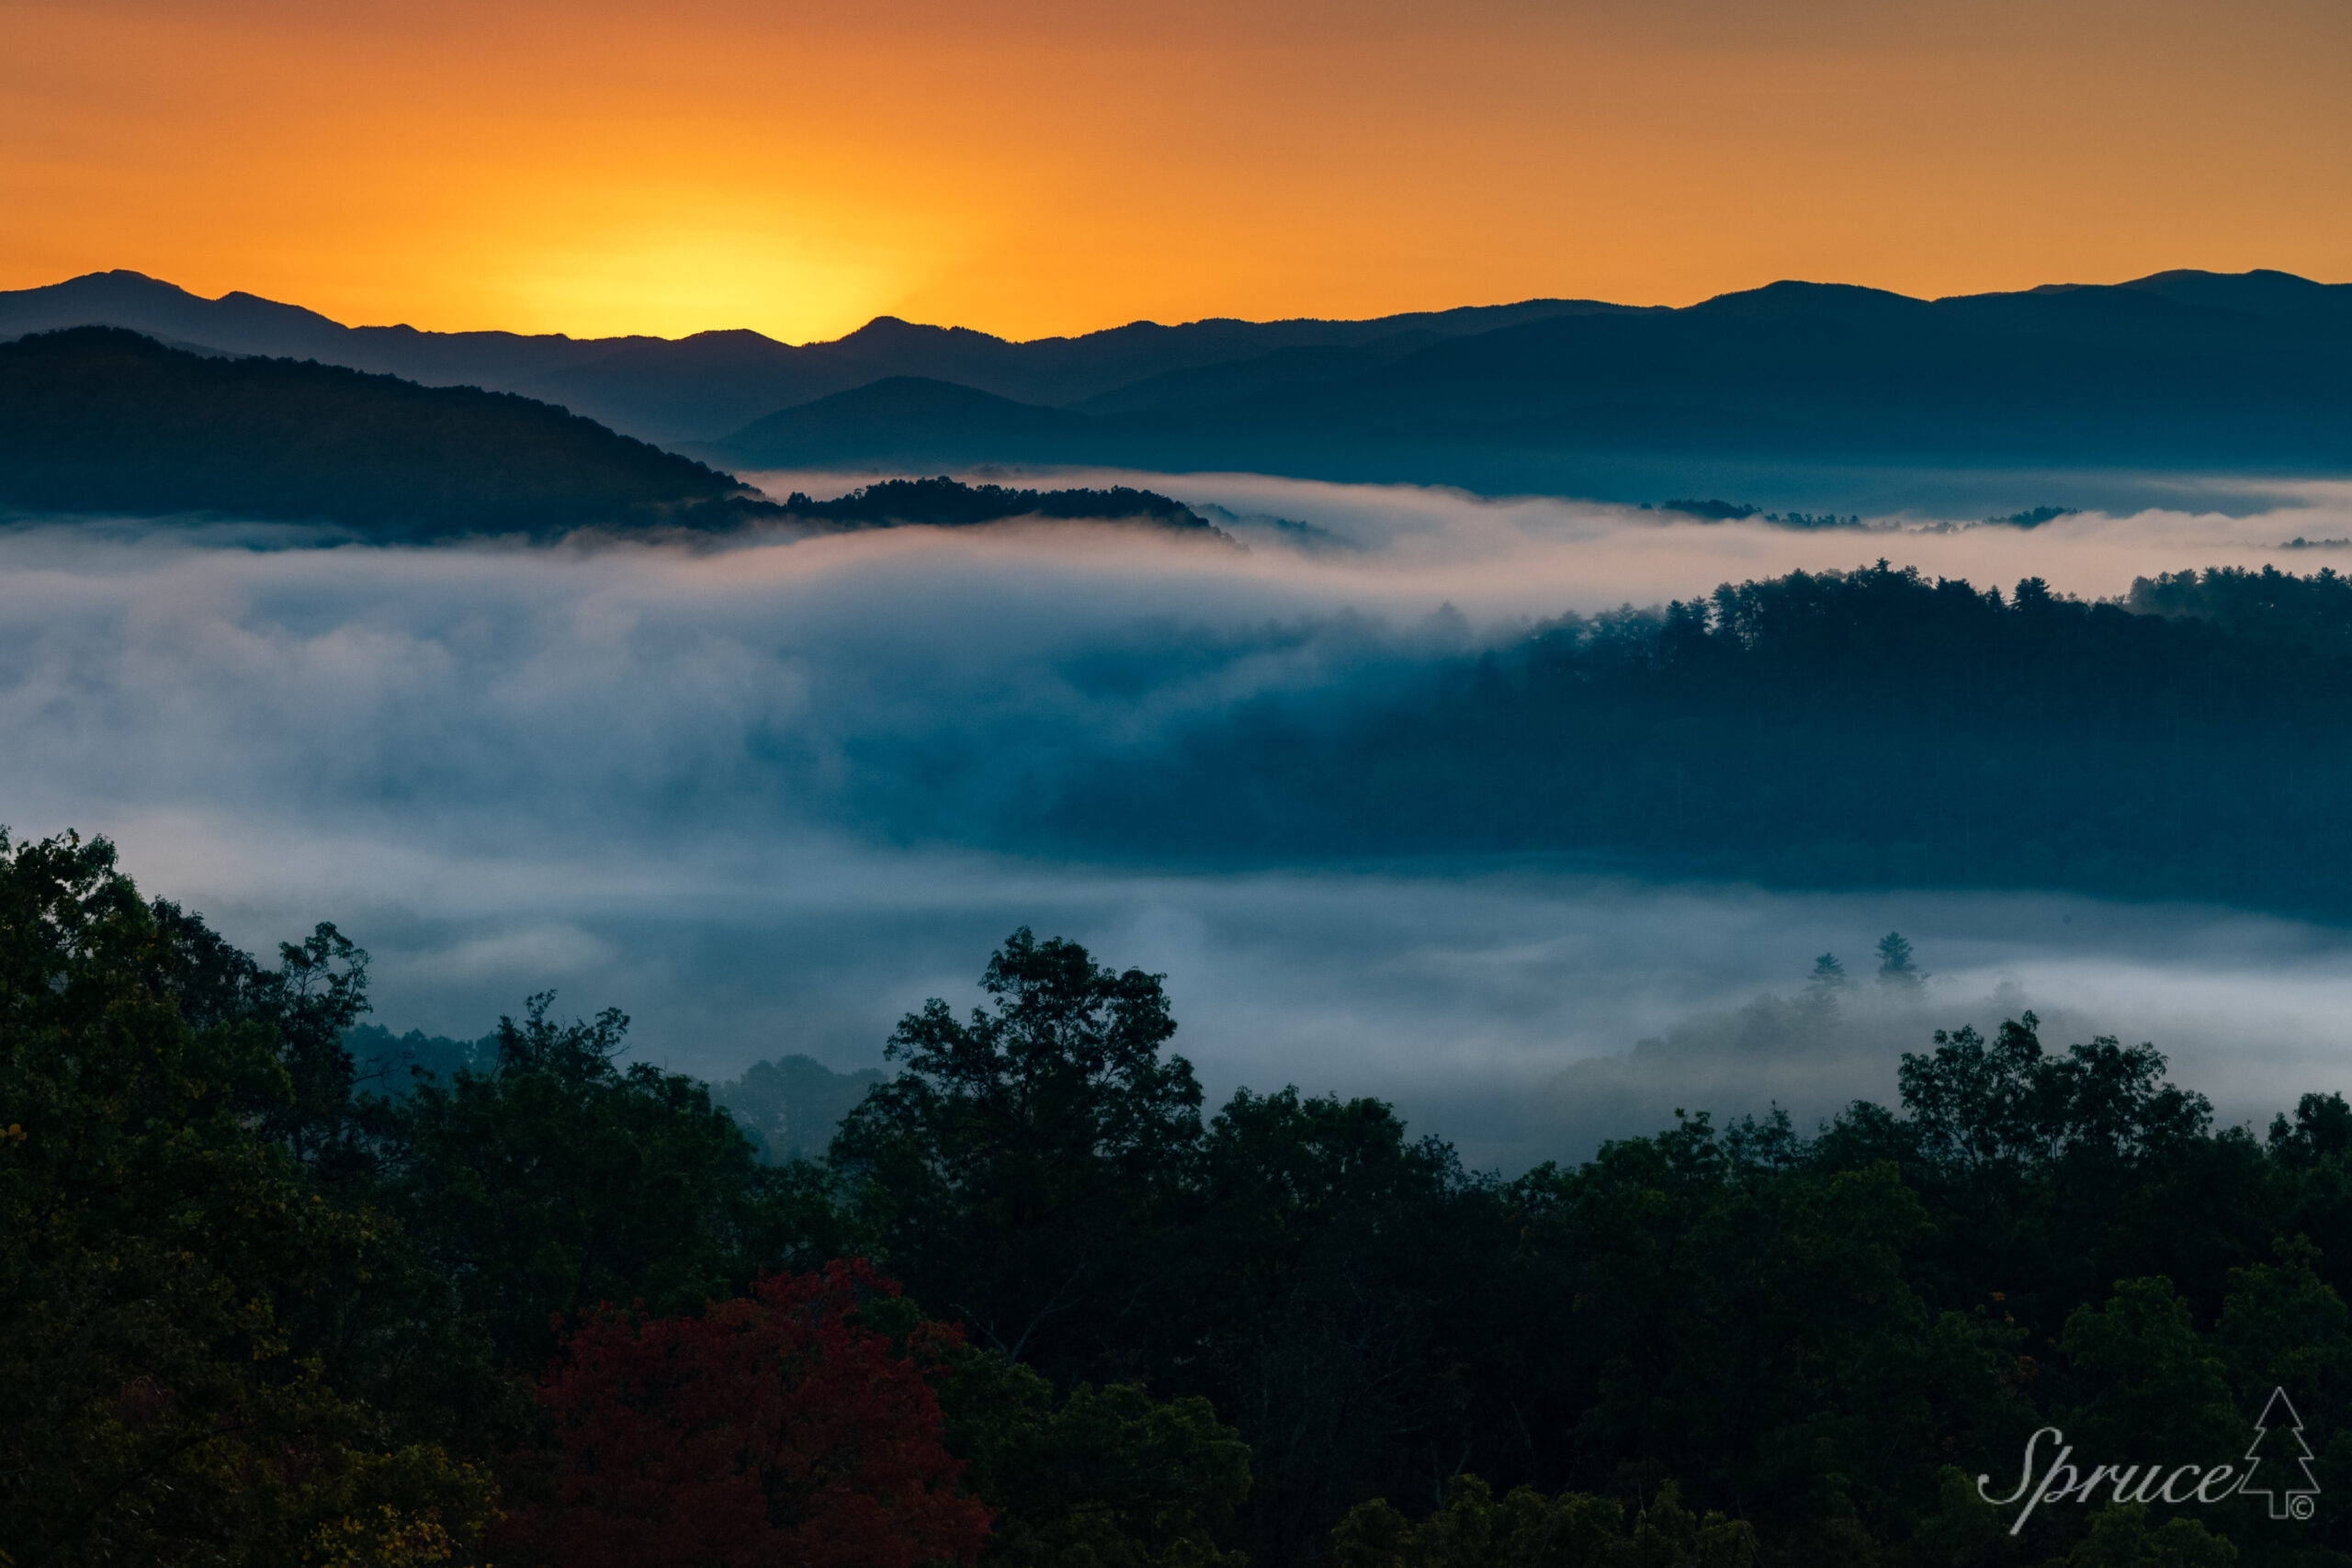
2. Get up early to capture the morning fog
If you want to take some truly stunning photos of the Smoky Mountains, then you’ll need to get up early to catch the morning fog. After all this is how the Smoky Mountains got their name. It occurs most mornings in the valleys and rivers. Here are some tips to help you make the most of this magical time of day. First, plan your route in advance. Decide which overlooks you want to visit and map out the best route to get there. Plan on starting at higher elevation overlooks to be above the fog. Spend time and be patient as the fog changes and dissipates during the morning. After shooting from above the fog, move down to lower elevation. This is when you can look for vistas with contrasting areas of sharp detail and wispy fog.
Morning fog in the Smoky Mountains.
3. Use a tripod
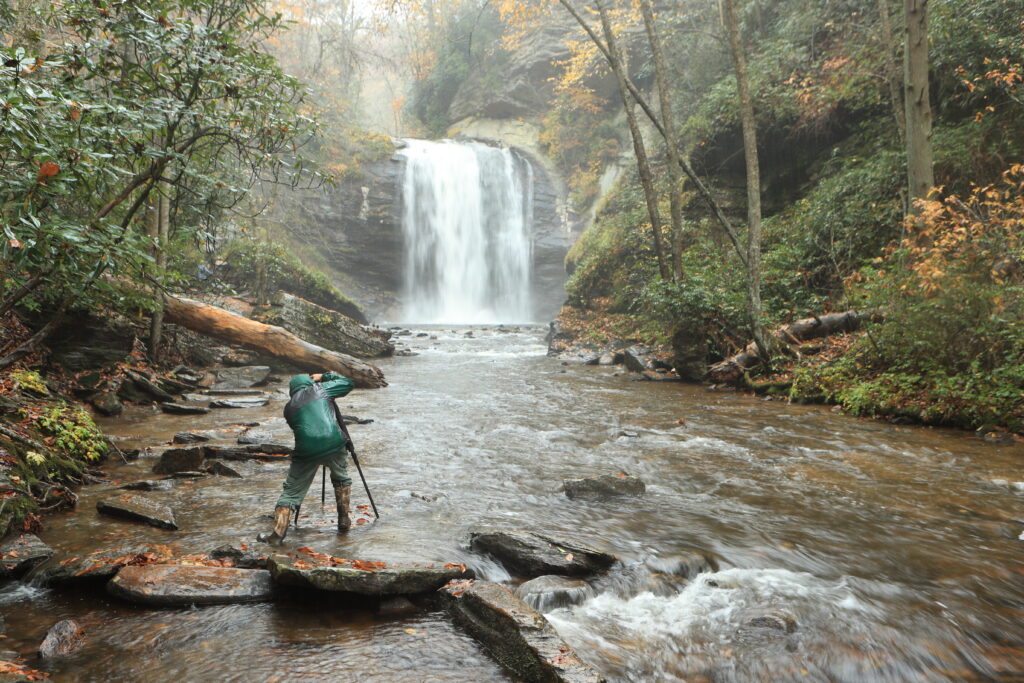
Another way to take great photos is to use a tripod. This will help keep your camera steady and prevent unwanted blurriness. A tripod is a must have to capture soft water effects when photographing waterfalls and rivers in the Smokies. You will need to locate and select waterfalls with the right amount of water. You don’t want rushing water. Large amounts of rushing water result in over exposed images. Small amounts of constant water will give the best results. To create the soft, misty water effect you will use a slow shutter speed. Typically, a speed of 1/8 of a second to 1/4 of a second will work. The shutter speed will be dependent on the speed and amount of water. Using a tripod prevents the image being blurred from the slow shutter speed. Experiment with different settings and different angles to get the look that you want.
Getting in the river to get the shot.
4. Hire a guide
When visiting an area that you are not familiar with, there are many benefits to hiring a local guide who can help you get the images that you want. Local knowledge from a guide will save you a considerable amount of time researching an area. Plus, the guide will know spots and have insights from experience that you will not be able to find on the internet or in books. Lastly, a guide who specializes in photography will be able to help you with camera settings, set-up for the best compositions, and other pointers while guiding. Even though I am an experienced guide and photographer, I use guides when I visit new areas. The time savings and local knowledge are invaluable.
In conclusion, when photographing in the Smoky Mountains, get started early in the morning to capture the mountain mist at sunrise. Plan ahead so that you can take advantage of the golden hour for stunning landscapes and wildlife. Use a tripod to ensure the best results for your landscape photography. Lastly, consider hiring a guide to ensure that you get to the right spots at the right times to capture the perfect photos. And don’t forget that the more you practice the better your final results will be.
Have you ever looked at an image that grabbed your attention and held your interest as you gazed at it? Did you wonder how the artist went about creating that visual experience? There is a good chance that some basic rules of composition were used in creating the image. In addition to knowing how to use your camera, learning a few basic composition techniques will greatly improve your images. We will cover 4 quick tips to improve composition in your photography:
Rule of Thirds
Leading Lines
Color Bokeh
Natural Framing
1. Rule of Thirds
The “rule of thirds” refers to dividing an image into thirds horizontally and vertically. Placing subjects or strong lines of an image at the intersection points of the lines or along the lines themselves creates a balanced, visually pleasing composition.
Compare the two images below. In the first image, you will notice that the subject is placed according to the rule of thirds. Also, the lines of the rocks and mountains are roughly dividing the image into thirds. In the second image, the subject is more centered. The first image is more visually pleasing and has a more dramatic feel.
Image 1: Rule of ThirdsImage 2: Rule of Thirds Not Utilized
2. Leading Lines
Leading lines are lines in an image that lead the viewer’s eyes from one part of the image to another. Frequently the line or lines will lead towards the main subject or focal point of the image. Leading lines in landscape photography add depth and perspective to an image making a scene more three dimensional.
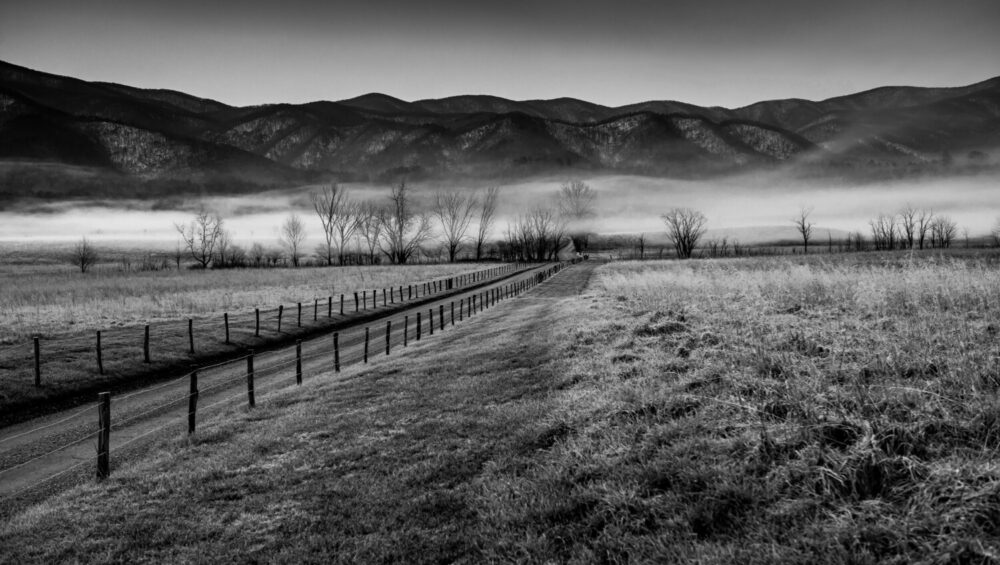
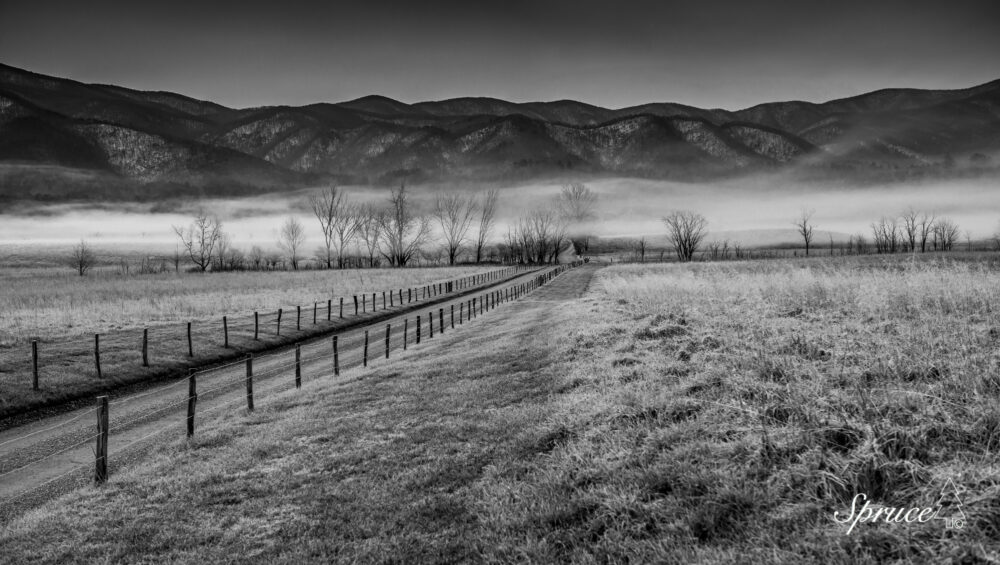
In this black and white image of Hyatt Lane in Cades Cove, notice how the leading lines of the fence and the road lead you into the field towards the mountains. The leading lines draw your eyes into the image creating a sense of depth and perspective. Also, note how the rule of thirds is utilized in the scene.
“The Road”. Example of leading lines and rule of thirds.
3. Color Bokeh
Bokeh refers to the out-of-focus areas of an image. Bokeh can be used to create a pleasing background effect for subjects. It can result in an image where the subject appears to pop off the page. The basic technique for creating bokeh is to be as close to the subject as possible with the background at a significant distance and shoot with a shallow depth of field (large aperture). It is also important to pay attention to the colors, highlights, and shadows of the background to ensure optimal placement of the subject.
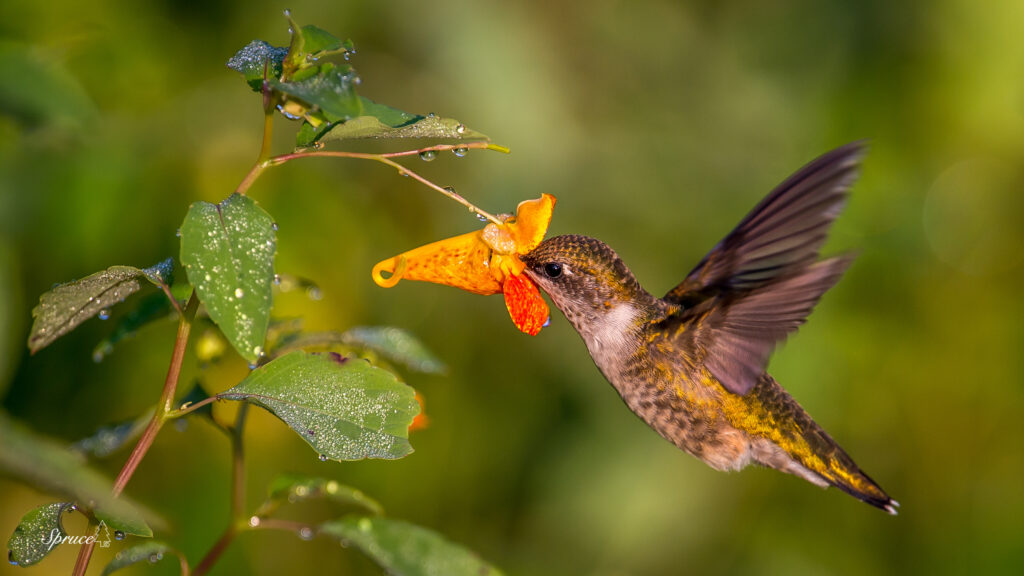
Notice how in this image of a ruby-throated hummingbird sipping nectar from a jewelweed blossom the background is blurred creating a soft, complementing background to the bird. The bird and flower appear almost 3-D.
Ruby-throated hummingbird with soft color bokeh.
4. Natural Framing
Natural framing is when an element within the image such as tree branches or an architectural element frame the subject of the image. This draws the viewer’s eyes into the photo and serves to highlight the subject. Natural framing creates a strong composition emphasizing the subject.
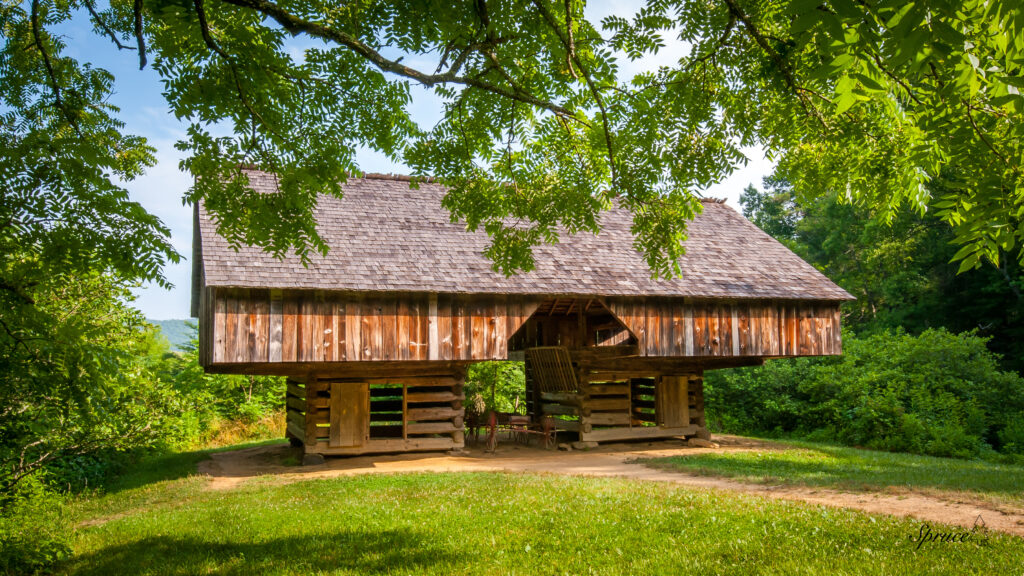
Cantilever Barn in Cades Cove with a walnut tree used for natural framing.
In this barn image of the cantilever barn in Cades Cove, notice how the walnut tree in the foreground is used to frame the subject. The eyes are drawn into the center focal point of the picture.
Lastly, keep in mind when composing your photographs in the field to leave room in your image for later cropping during post processing. When reviewing your images, you often will see a way to compose an image that you did not see when shooting it. So having room in the image to crop it will be important. With a little practice these compositional techniques will become second nature when you are viewing a scene and will improve your photography.
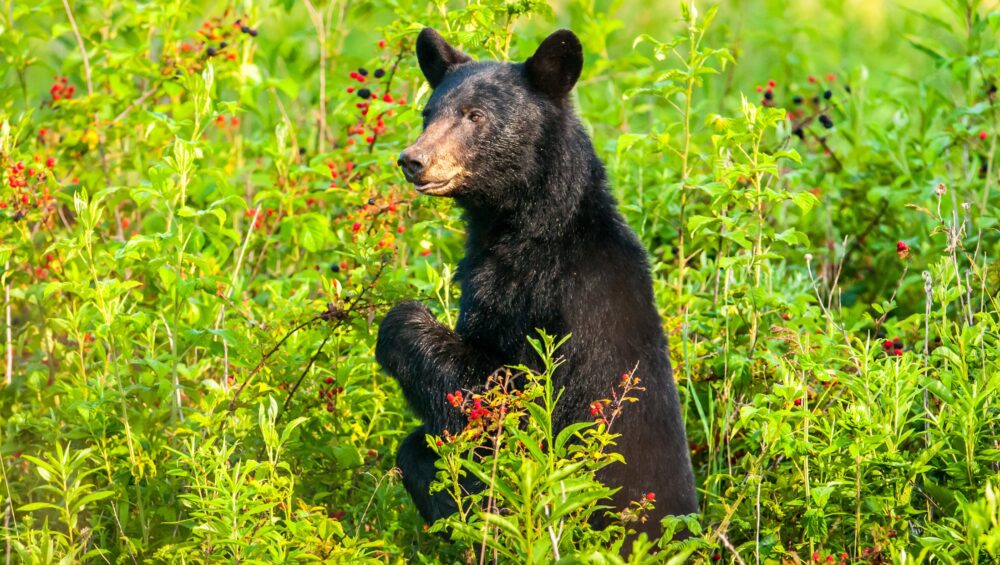
The American Black Bear is the iconic inhabitant of the Great Smoky Mountains. No visit is complete without picking-up a bear souvenir and trying to site one while driving a scenic byway. But have you ever wondered what the bears are doing while you are looking for them? Most likely, if they are not sleeping, they are busy foraging for food. This is particularly true for female bears who are nursing their cubs.
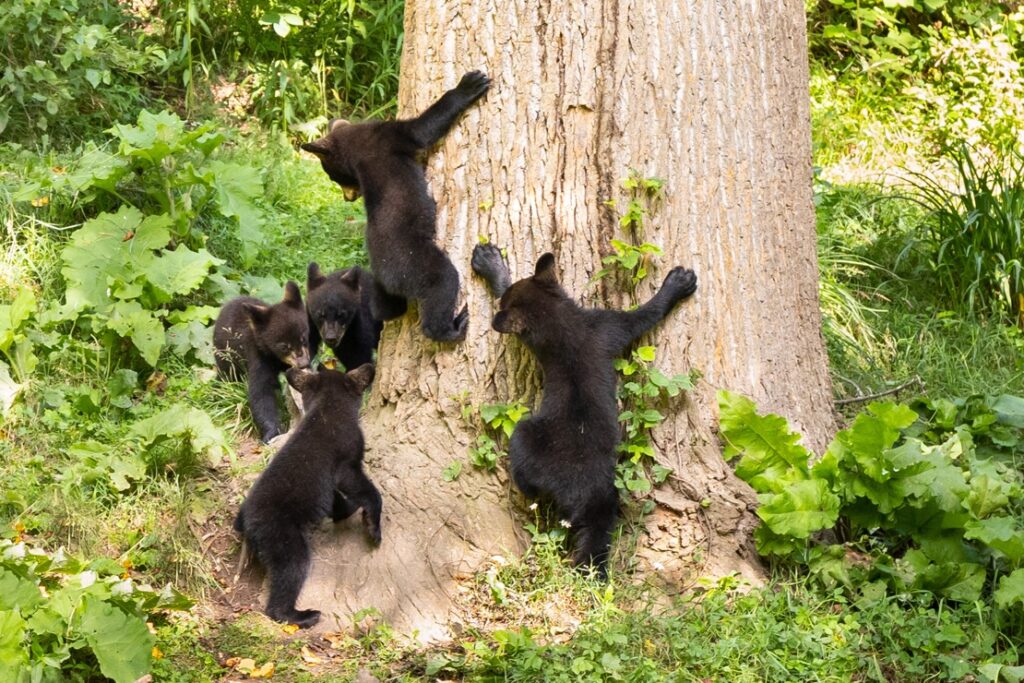
Five bear cubs playing
So, what are they eating out there in the woods and fields of the Smokies? Black bears are omnivorous, meaning that they are opportunistic feeders who will eat a variety of things, including vegetation and meat. In the Spring when food is scarce, bears may eat grasses, inner tree bark, insects, and insect larvae.They will tear apart rotting logs and overturn rocks looking for invertebrates. Bears will also feed on carrion that they come across. They will follow the food sources that become available throughout the year such as blackberries, cherries, acorns, and walnuts.
Black Bears are the smallest North American bear, but they have the keenest noses in the park. Bears rely on their sense of smell for finding food.It is thought that they can smell a food source over two miles away! Because of this it is always important to follow proper food storage protocols when hiking and camping to help minimize human and bear interactions.
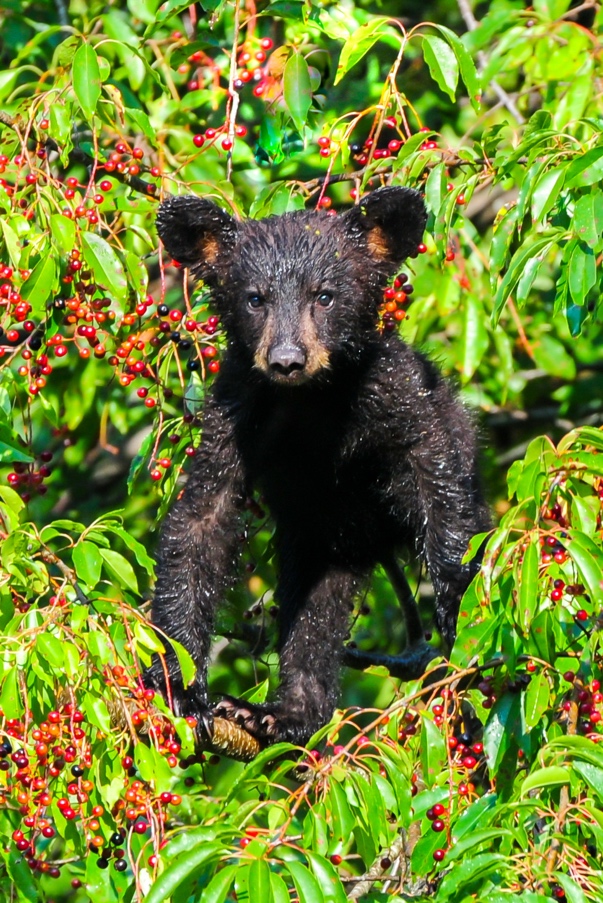
Bear cub in cherry tree
While you enjoy your visit to the Great Smoky Mountains, don’t forget to respect the wildlife and the wilderness around you. Bears and the other inhabitants of the area are wild animals and approaching them is dangerous for both humans and the animals. Photographs and videos in this article were taken with appropriate telephoto/zoom lenses while maintaining a safe distance from the subject.
Video of black bear digging up a yellow jacket nest to eat the larvae.