
Smoky Mountain Wildflowers – Fun Facts
When visiting the Great Smoky Mountains, you’ll want to take advantage of the beautiful scenery and take some amazing photos. Here are a few tips to help you get the most out of your Smoky Mountain photography.
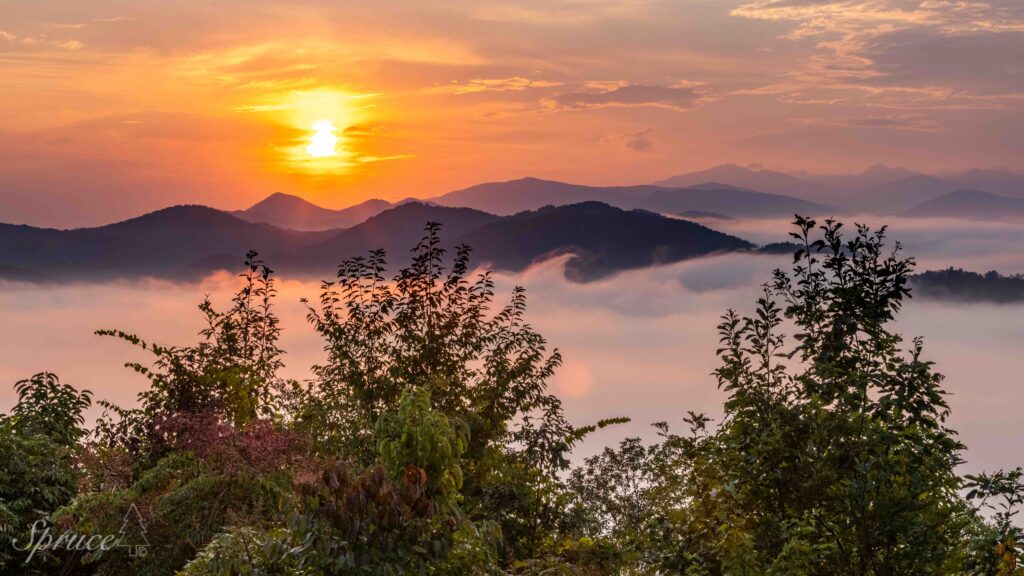
1. Take advantage of the golden hour
One of the best times to capture great landscape and wildlife photography is during golden hour. This is the time shortly after sunrise or shortly before sunset. The lighting is softer and warmer during golden hour, and the mountains tend to take on a beautiful, golden glow. Here are a few pointers for taking amazing photos during golden hour. Position the rising or setting sun behind you. Watch for warm tones hitting your subject. Use a tripod to ensure sharp images. Golden hour is a special time of day, so make sure to savor the moment and take in the stunning views and photographic opportunities.
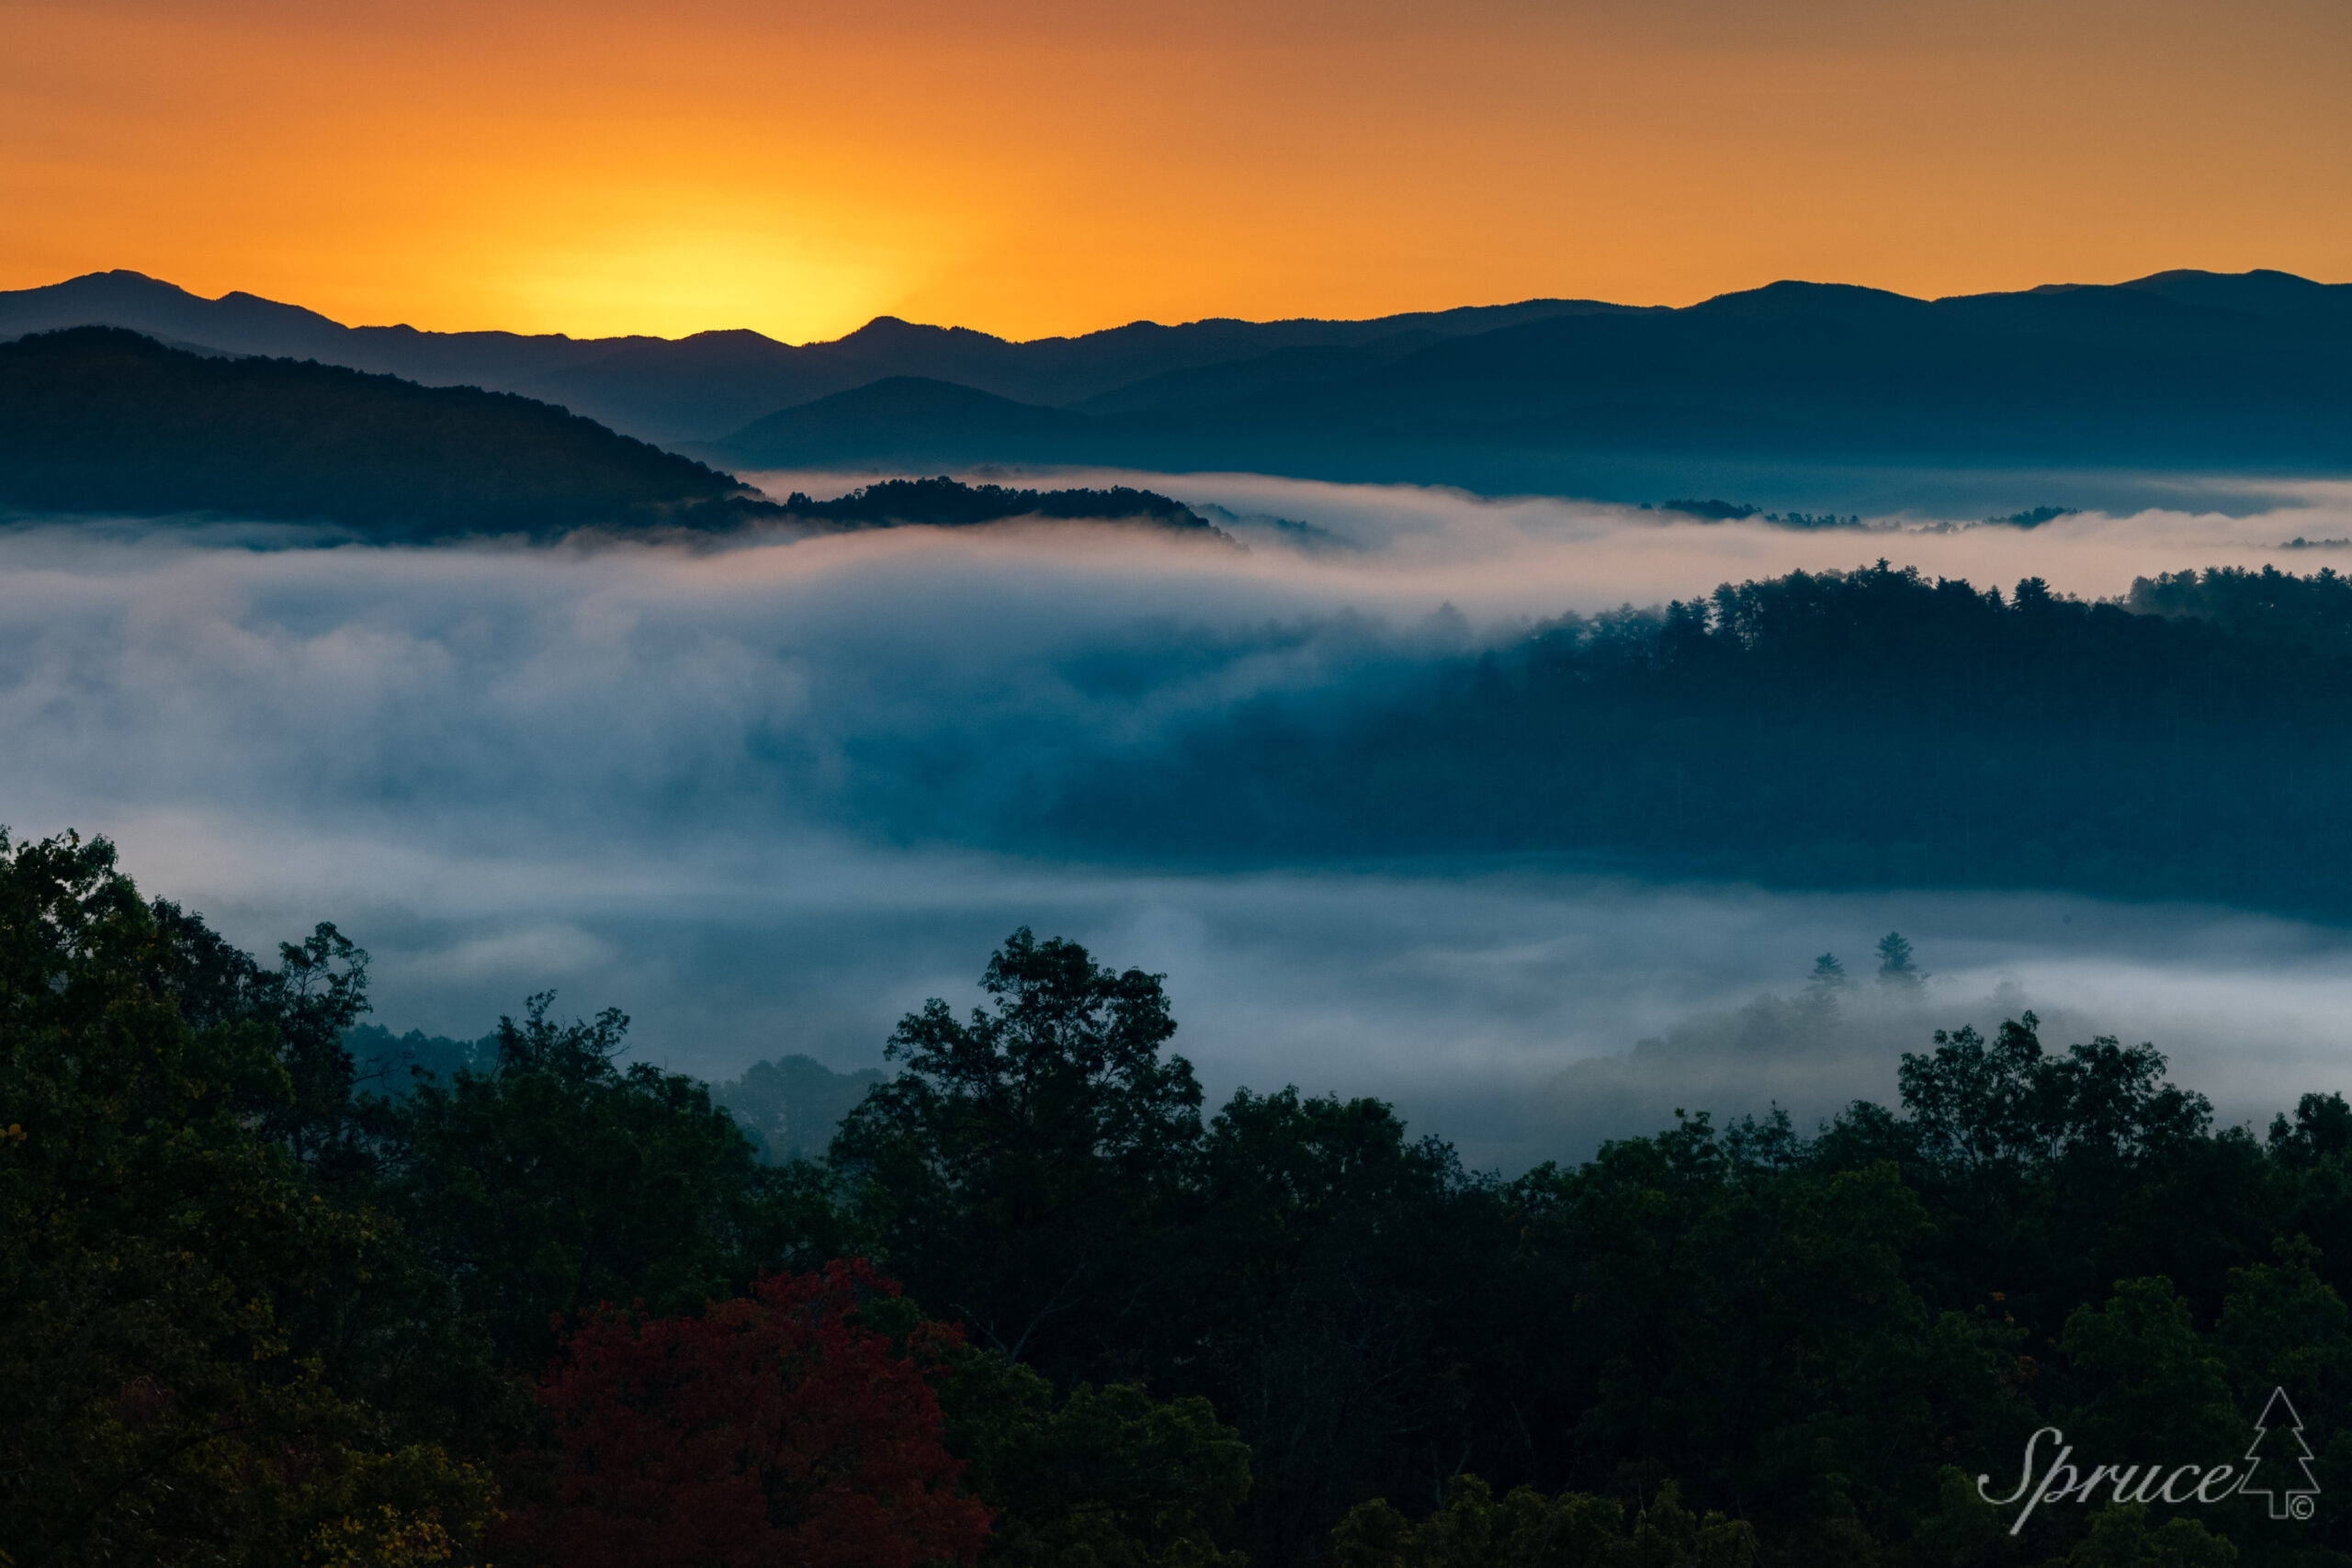
2. Get up early to capture the morning fog
If you want to take some truly stunning photos of the Smoky Mountains, then you’ll need to get up early to catch the morning fog. After all this is how the Smoky Mountains got their name. It occurs most mornings in the valleys and rivers. Here are some tips to help you make the most of this magical time of day. First, plan your route in advance. Decide which overlooks you want to visit and map out the best route to get there. Plan on starting at higher elevation overlooks to be above the fog. Spend time and be patient as the fog changes and dissipates during the morning. After shooting from above the fog, move down to lower elevation. This is when you can look for vistas with contrasting areas of sharp detail and wispy fog.
3. Use a tripod
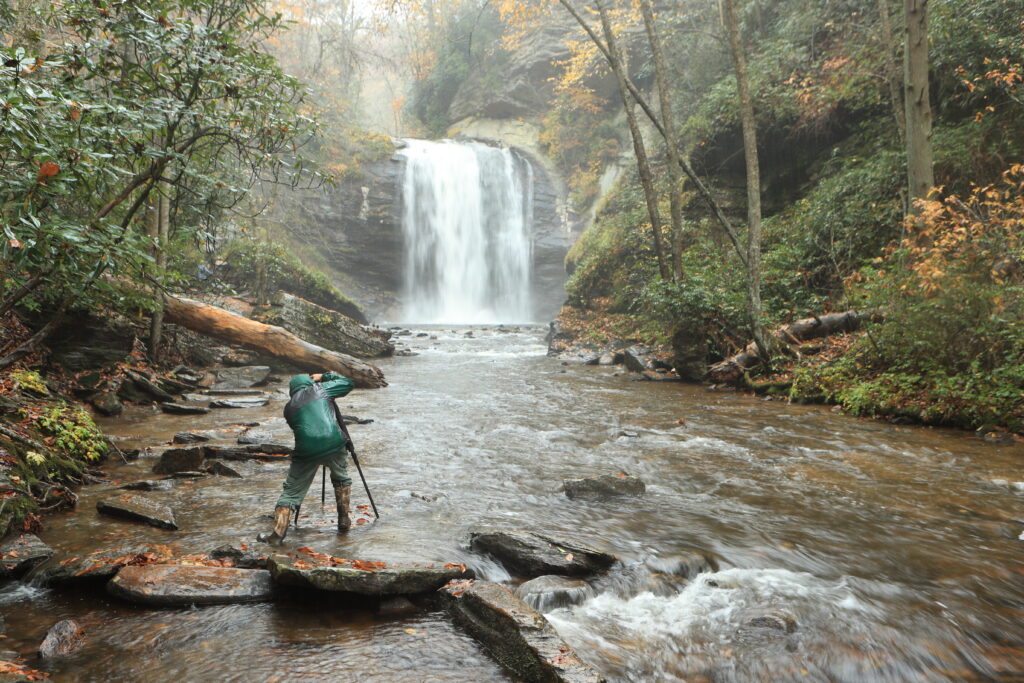
Another way to take great photos is to use a tripod. This will help keep your camera steady and prevent unwanted blurriness. A tripod is a must have to capture soft water effects when photographing waterfalls and rivers in the Smokies. You will need to locate and select waterfalls with the right amount of water. You don’t want rushing water. Large amounts of rushing water result in over exposed images. Small amounts of constant water will give the best results. To create the soft, misty water effect you will use a slow shutter speed. Typically, a speed of 1/8 of a second to 1/4 of a second will work. The shutter speed will be dependent on the speed and amount of water. Using a tripod prevents the image being blurred from the slow shutter speed. Experiment with different settings and different angles to get the look that you want.
4. Hire a guide
When visiting an area that you are not familiar with, there are many benefits to hiring a local guide who can help you get the images that you want. Local knowledge from a guide will save you a considerable amount of time researching an area. Plus, the guide will know spots and have insights from experience that you will not be able to find on the internet or in books. Lastly, a guide who specializes in photography will be able to help you with camera settings, set-up for the best compositions, and other pointers while guiding. Even though I am an experienced guide and photographer, I use guides when I visit new areas. The time savings and local knowledge are invaluable.
In conclusion, when photographing in the Smoky Mountains, get started early in the morning to capture the mountain mist at sunrise. Plan ahead so that you can take advantage of the golden hour for stunning landscapes and wildlife. Use a tripod to ensure the best results for your landscape photography. Lastly, consider hiring a guide to ensure that you get to the right spots at the right times to capture the perfect photos. And don’t forget that the more you practice the better your final results will be.
Have you ever looked at an image that grabbed your attention and held your interest as you gazed at it? Did you wonder how the artist went about creating that visual experience? There is a good chance that some basic rules of composition were used in creating the image. In addition to knowing how to use your camera, learning a few basic composition techniques will greatly improve your images. We will cover 4 quick tips to improve composition in your photography:
The “rule of thirds” refers to dividing an image into thirds horizontally and vertically. Placing subjects or strong lines of an image at the intersection points of the lines or along the lines themselves creates a balanced, visually pleasing composition.
Compare the two images below. In the first image, you will notice that the subject is placed according to the rule of thirds. Also, the lines of the rocks and mountains are roughly dividing the image into thirds. In the second image, the subject is more centered. The first image is more visually pleasing and has a more dramatic feel.

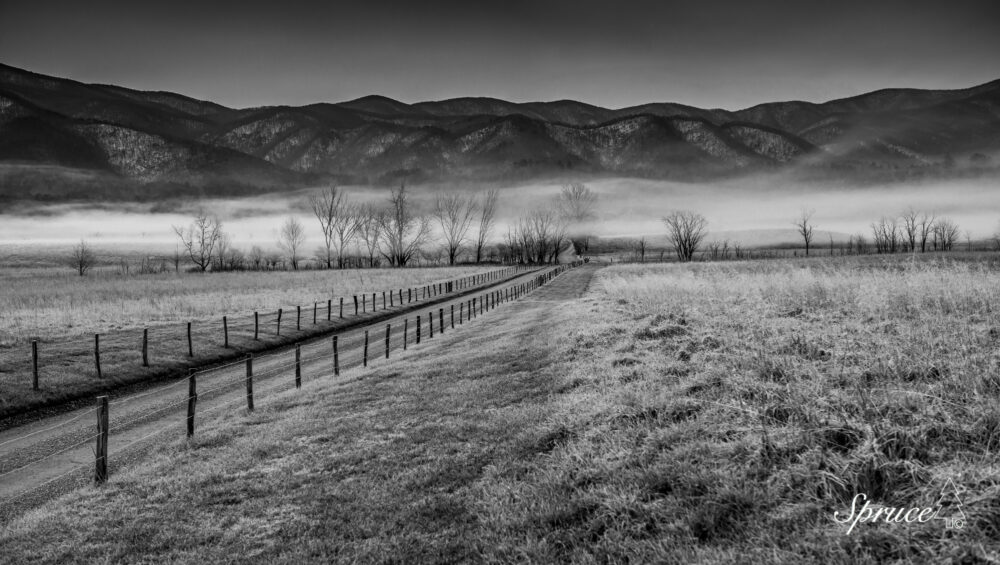
Leading lines are lines in an image that lead the viewer’s eyes from one part of the image to another. Frequently the line or lines will lead towards the main subject or focal point of the image. Leading lines in landscape photography add depth and perspective to an image making a scene more three dimensional.
In this black and white image of Hyatt Lane in Cades Cove, notice how the leading lines of the fence and the road lead you into the field towards the mountains. The leading lines draw your eyes into the image creating a sense of depth and perspective. Also, note how the rule of thirds is utilized in the scene.

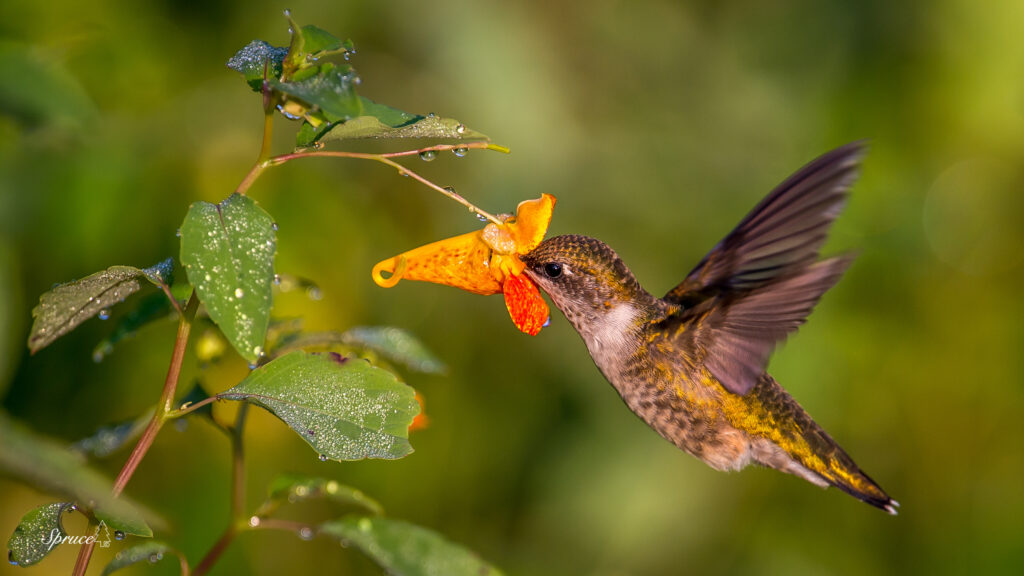
Bokeh refers to the out-of-focus areas of an image. Bokeh can be used to create a pleasing background effect for subjects. It can result in an image where the subject appears to pop off the page. The basic technique for creating bokeh is to be as close to the subject as possible with the background at a significant distance and shoot with a shallow depth of field (large aperture). It is also important to pay attention to the colors, highlights, and shadows of the background to ensure optimal placement of the subject.
Notice how in this image of a ruby-throated hummingbird sipping nectar from a jewelweed blossom the background is blurred creating a soft, complementing background to the bird. The bird and flower appear almost 3-D.
Natural framing is when an element within the image such as tree branches or an architectural element frame the subject of the image. This draws the viewer’s eyes into the photo and serves to highlight the subject. Natural framing creates a strong composition emphasizing the subject.
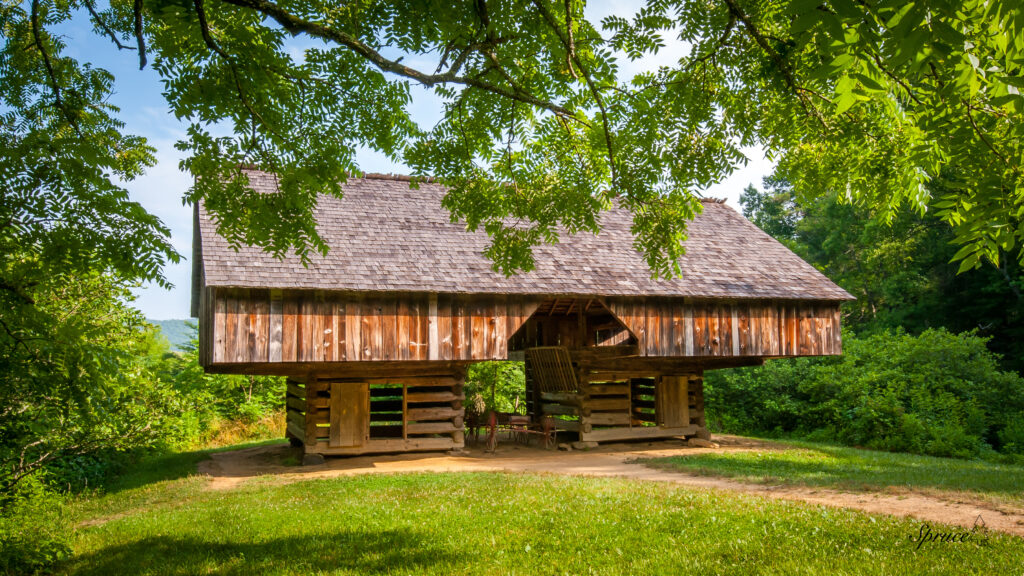
In this barn image of the cantilever barn in Cades Cove, notice how the walnut tree in the foreground is used to frame the subject. The eyes are drawn into the center focal point of the picture.
Lastly, keep in mind when composing your photographs in the field to leave room in your image for later cropping during post processing. When reviewing your images, you often will see a way to compose an image that you did not see when shooting it. So having room in the image to crop it will be important. With a little practice these compositional techniques will become second nature when you are viewing a scene and will improve your photography.
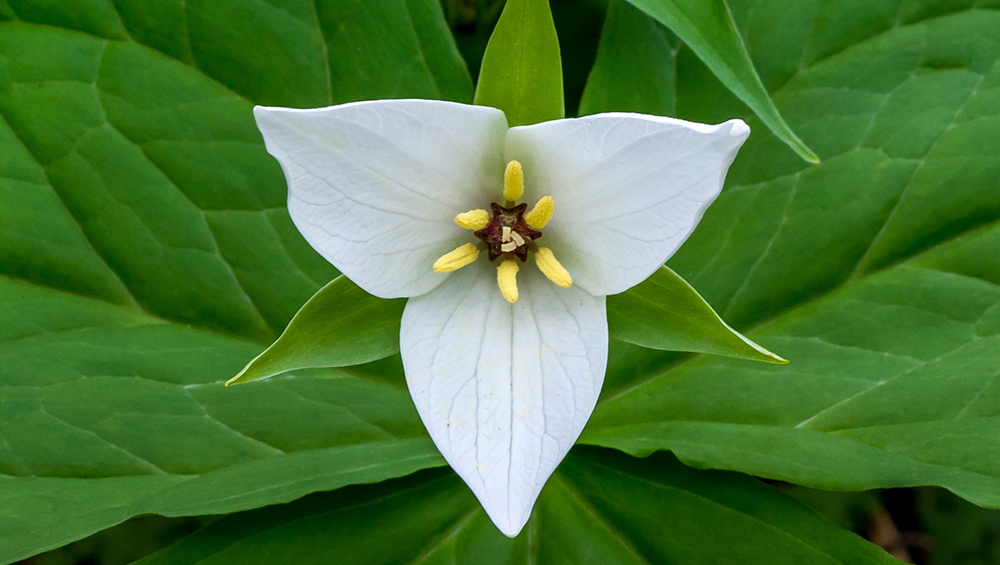
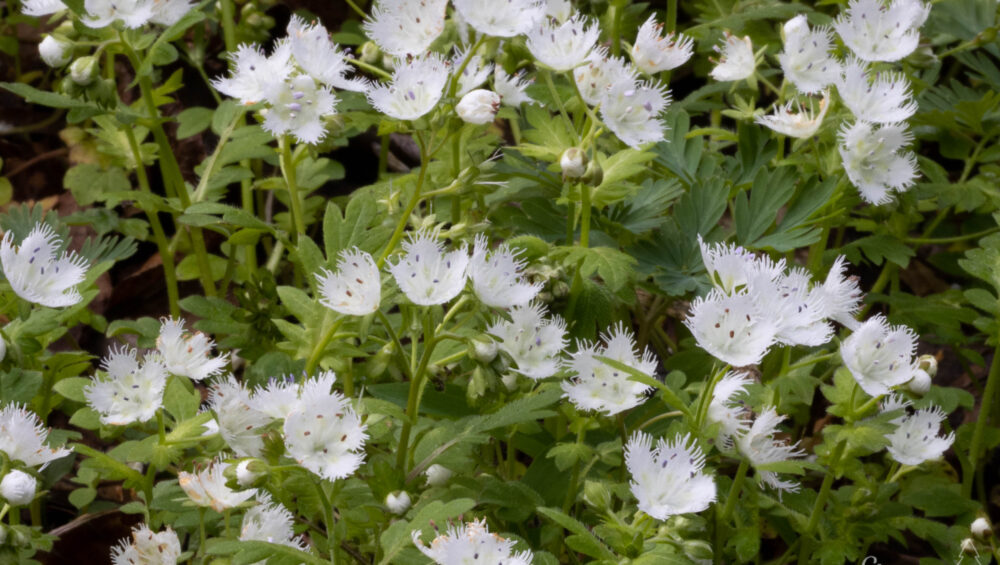
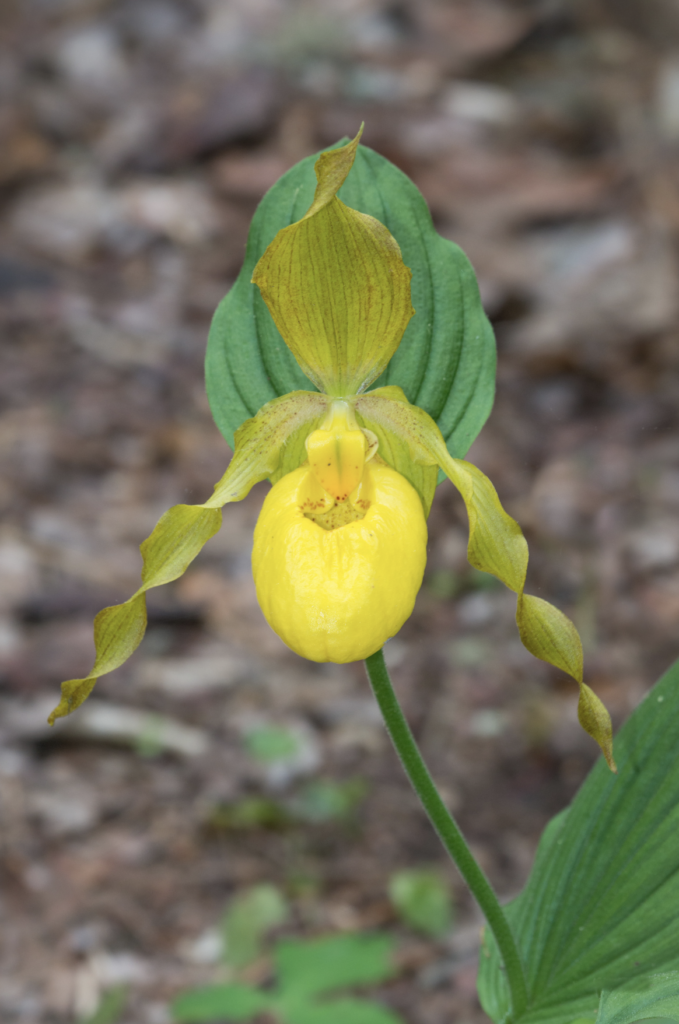
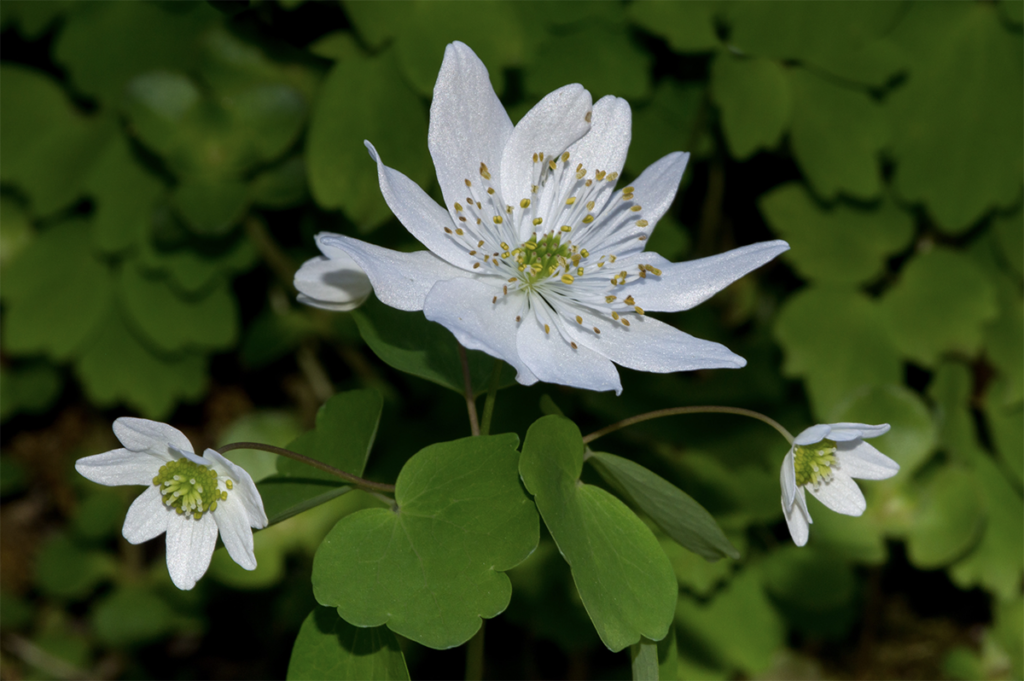
The Great Smoky Mountains is acclaimed for its diversity in both flora and fauna. This diversity includes over 1500 kinds of flowering plants. This is more than in any other North American national park according to the National Park Service (www.nps.gov). Flowers bloom in the park nearly year-round. The spring ephemerals start the show in the late winter.
As their name suggests, ephemerals last only a short time appearing in late winter and early spring. They become dormant come May or June. Ephemerals take advantage of the sunlight, moisture, and nutrients available to them before the deciduous trees leaf out.
A few of the spring ephemerals to look for in the Smokies include trillium, columbine, bleeding heart, fire pink, violets, lady’s slipper, jack-in-the-pulpit, bloodroot, spring beauty, trout lily, wood anemones, and dwarf iris.
Photographing wildflowers can be a challenge particularly in the Smokies; however, it is well worth the effort to enjoy this amazing diversity of nature. The first and most important consideration when wanting to photograph wildflowers is locating them. It can be very helpful to use a local guide or join a wildflower workshop. Using a guide will maximize viewing and photography time by reducing the amount of research and searching in the field that are required. For those who are interested in improving their photography skills, a workshop provides additional hands-on guidance and instruction.
Some helpful tools to consider for wildflower photography are a field guide to identify flowers, a lens that allows sufficient closeness to the subject, a tripod, and a reflector (to add light and block wind). Time of day, lighting, and weather conditions will impact wildflower photography. Too early in the morning and plants may not be open yet, but harsh lighting should be avoided. Overcast days are a good time to photograph flowers, because it provides for even lighting. For identification purposes, be sure to photograph the flower and the foliage. A good practice is to photograph the entire plant, close-ups of the blooms, and close-ups of the foliage. Working as a team or in a group is also beneficial for wildflower photography. Having an extra pair of hands to hold a reflector and extra eyes looking for an elusive subject can greatly enhance the experience.
To experience first-hand the wonders of spring ephemerals, join us for our Spring Wildflower Workshop . Our limited group size allows hands-on guidance and technique instruction as we capture some of the amazing flowers in the Smokies.
.
REFERENCES:
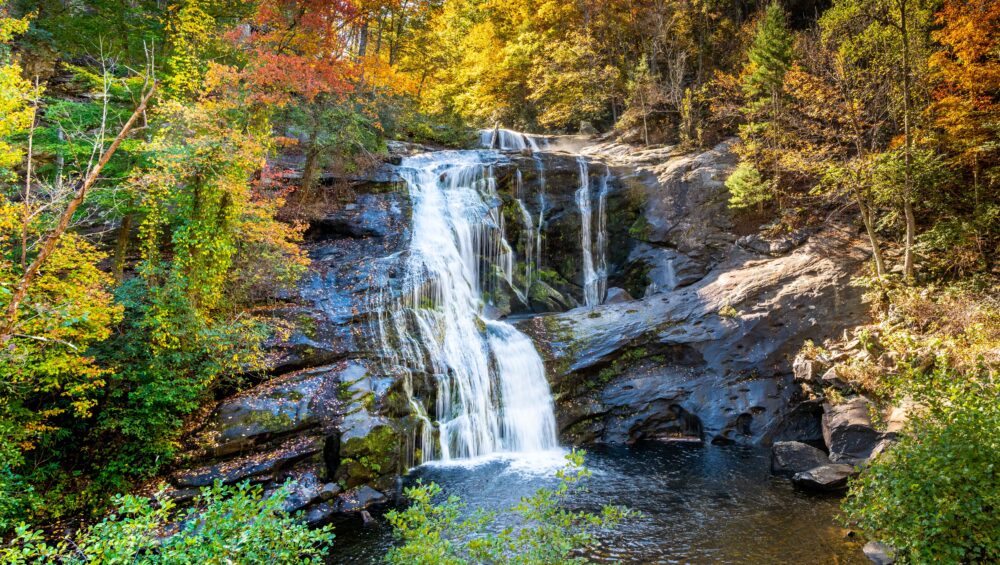
Capturing pleasing images of waterfalls requires certain know-how and equipment including the right tools, techniques, timing, effort, and planning. Of course, your tools include a camera and lenses to record the moment in time; plus, the effort to learn techniques to correctly use those tools. It also takes effort to position yourself at the proper location to utilize your tools and technique. In this article, I will focus on two of the most overlooked elements for capturing beautiful waterfall images – timing and planning.
Like most photography, good lighting or even lighting makes achieving our goals easier. Photographers that spend a lot of time shooting waterfalls enjoy doing so on overcast or light raining days. On both occasions, the lighting is even or more consistent for the whole composition. Water that is falling (often called whitewater) can easily blowout your image if it is hit by direct sunlight. Cloudy days keep that from happening.
As much as we enjoy photographing waterfalls on cloudy or rainy days, we dislike photographing them after a heavy rain or after several days of light rain. This is due to the higher water levels in the river, the amount of water going over the falls, and the murky color of the water itself. The soft water effect created by technique looks best with cleaner water and less water volume cascading over the drop.
This leads to the planning stage of photographing Smoky Mountain waterfalls. If you live close to our waterfalls, you would watch weather predictions and choose the best conditions and timing in advance. However, when you have to book well in advance because you live a great distance away, you would look at those same conditions once you arrive. If you are here for a week and waterfalls are on your list, predict which day might be better for waterfall photography. So, when planning and timing waterfall photography, consider recent rainfall amounts, upcoming weather predictions, and select the best timing possible to capitalize on the conditions most suited for capturing pleasing images.